Monday, August 23, 2010

At long last... throw pillows!

Only a short 8 months after I bought the fabric to turn our existing brown couch pillows into fabulous throw pillows, I have completed the project! What took so darn long, you wonder? Well, frankly, life...and our little condo. The sewing machine was tucked away in a closet, which meant bringing it out and setting it up.

My original plan was to take the pillows already on the couch, use the stuffing, the zipper, and the edging to create new pillows to match our lampshades (to some degree). I picked out this polka dot circular pattern - I loved the colours and the graphics and knew that it would be a great addition to the brown couch. I even got off to an ambitious start by cutting out the fabrics. I figured out how to add the zipper by examining how the old pillow was put together, and I even got as far as getting one pillow unstuffed and ripped apart - and that is how it stayed for the next several months.  It was a little sad, actually, to see all the parts splayed on the floor...


Well, I think Matt got tired of seeing that little pillow, stuffing out and about, just lying in the condo, and I knew I had to finish what I had started. I managed to get the zipper in quite nicely (this turned out to be an easier route than I had thought it might be...and doesn't require any hand stitching after stuffing!), but when it came to the edging, I learned the hard way that it wouldn't be quite as easy. I stitched one side, but after much frustration, I decided, for my sanity, to rip it out and just keep the pillow plain and simple. And really, when I set my mind to it, completing both pillows took me just over an hour! You would have thought I might have found an hour in the last 8 months to put these two together...

Let's take a look at the before and after shots (my FAVOURITE part of any makeover/renovation by far! Oh, that and the Big Reveal....)


The zipper is nicely concealed at the back, and the great thing is that these are completely removable and washable. And the cost for making them? Only about $20 bucks for the fabric! Since I reused all the essential elements, this was a quick and cheap way to update our couch. And I even learned a thing or two about how to add zippers to fabric.

Tuesday, August 17, 2010

I Scream for Ice Cream!

Alright, so maybe I don't exactly scream for ice cream (not since I was a kid, anyway), but I do enjoy the creamy cold stuff - especially if bits of chocolate skor bits are mixed throughout. For that we usually head to the local DQ, and now that they offer the Mini cups, it's a quick little sugar fix I need after dinner (did you know that DQ has a blog? Now you never have to miss an important announcement from the Dairy Queen...I mean, if that's important to you.).


So...where am I going with this? Well, no longer do we have to venture outside the condo for the taste of mini blizzard - we can make them at home!. My loving sister (the ice cream lover that she is), gave us a wonderful wedding gift - the gift of homemade ice cream! We had seen this little mixer in a newspaper probably about 2 or 3 months ago, and Sarah has been looking for them in stores ever since. It turned out that the ad that ran didn't happen to mention that they were only available in store early August. But Sarah finally managed to get her hands on one (in the end, she just ordered it online), and along with the mixer, she threw in a great book on ice cream, some great sundae toppers, and a couple ice cream mixers, too. I must admit, I love the gifts that I get to both use and eat (the edible variety I especially love because it won't take up much space in the kitchen for long...).


But let me tell you why I particularly liked this mixer - it's small, making 2 - 4 servings at a time. And storage is convenient, as long as you have room in your freezer - you simply place the two bowls in the freezer.  Then, when you're ready, mix together the milk, cream, vanilla, and sugar (for a basic soft serve ice cream) in a jar and let it sit in the fridge for about 15 minutes.


Once that's set, pour into one of the frozen bowls. Then place the motor on the bowl, hit the on switch, and let the machine do its thing. 15 minutes later you have frozen milk and sugar - also known as soft serve. We enjoyed this first batch over a warm peach cobbler, and with some left over, we'll enjoy a second serving tomorrow. Each bowl serves 1 - 2 people, so there isn't a need to find extra storage in the freezer for a large container. And with the new book of ice cream flavours, well, we have a lot of new recipes to try out. One quick and easy dessert is just put in a container of yogurt in the bowl, turn on the mixer, and voila - frozen yogurt!

For those of you without a handy-dandy ice cream maker of your own, check out this video on how to make ice cream with two plastic freezer bags. I've actually tried this out before and it works really well!

Mmm....what flavour shall we enjoy next?


Monday, August 16, 2010

Fat Friday - Taste of the Danforth

Just a week or so ago, Toronto celebrated its annual Taste of the Danforth. You might have heard a thing or two of the festival, but if not, briefly, they shut down a section of the Danforth for the various restaurants to offer a taste of their cooking to visitors. Neither Matt nor I had been before, so we thought we'd head out on a little taste adventure for our Fat Friday.

So, we hopped on the subway, headed out to the east end, exited at Broadview, and were immediately met with hoards of people trying to make their way along the street! It was like a crazy mass of people with no clearing in sight. But we did manage to find some open space to walk, only to be met with long line-ups for the food stalls. We were already hungry at this point, and the crowds and lines (not to mention the heat) were making us quickly grumpy, so we left the madness of the Danforth to head south to Leslieville, where we were certain we could get a great meal. We'll just head back to the Danforth on a regular day when the crowds won't be so crazy (it could be that we're just getting older and can't be bothered with crowds any more...).

We headed south to Queen St, only about a 20 minute walk from Danforth, to a little Italian restaurant we had been to before, Lil Baci (probably about the furthest thing from Greek food!).  With no line up and a small menu, we were enjoying our appetizer and glass of wine in no time. For a starter, we each ordered crustinies, prosciutto with caramelized red onions and Parmesan. Even though they came two to a plate, we each ordered our own - we were that hungry!

Next, the entrees. Matt went for a pizza - a favourite of his - spicy sausage with basil. A classic and delicious pizza to enjoy on a summer patio. Of course, the food probably tasted 10 times better because of our hunger and frustration, but Lil Baci has no problems with good food - they know how to dish it!
Myself, I have been on a huge pasta kick as of late, so how could I turn down the option to indulge myself yet again. The special that night was orecchiette, similar to that I enjoyed at Brassaii, but this one came served with hot sausage in a cream sauce (I am a sucker for cream sauces, yes sir!). I have to say I enjoyed the sun dried tomatoes better at Brassai, but this one was pretty tasty...and filling. Sadly, I think I had to leave some behind, and we didn't have room for gelato. But we did enjoy a specialty coffee afterwards.

It was great to enjoy dinner on a back yard patio. The sun slow set while we enjoyed our wine and conversation, and once it go too dark, the patio was lit with small strings of lights, just enough to see who you were talking with. We said at the beginning of the summer that we should have Patio Phat Phridays, but so far, this has been the only one we've made it to. Hopefully the nice weather keeps going so we can get to a few more.

Oh, I'm sorry. You thought I was going to write about Greek food....

Sunday, August 15, 2010

More baking with peaches...


You might already be a fan of my lime yogurt bread, so here's a new take on an old favourite: Peach Yogurt Bread! A great little afternoon snack with a cup a tea, or serve with a scoop of ice cream after dinner. That's right, just substitute the lime juice and zest for one peach. Simply wash then puree in either a food processor or blender until smooth, then add to the dry ingredients. You might need to adjust the flour quantity, perhaps adding a bit more, as the peach will be juicier. Just add more flour accordingly.

I have to admit that this first attempt did not turn out so great (yes, sometimes I do fail at new cooking projects). For one, as I previously mentioned, the pureed peach might require more flour, and I neglected to add any. Secondly, I opted to leave out the canola oil in this batch to see if that made any difference (and to offset the juicer peach). I was also short on cooking time as I was expecting company that afternoon. So, combine all of those things together, and I got an undercooked loaf. The flavour itself was delicious, but the consistency, not so much. It was the middle that was still rather doughy, so we didn't actual manage to eat our way through the loaf. And, contrary to what I thought would work, re-baking in the oven didn't do much.

But, all that being said, it is worth repeating and next time I'll make sure to bake longer, because the peachiness in the bread was really tasty! Hope you guys have better luck!

Oh, and I should warn you: should you decide to keep the skin on, which I did, it bakes into a rather interesting shade of brown, which doesn't really look all that appetizing. I think next time I'll take a few extra minutes and peel them. Ah, that's what happens with trial and error!

Thursday, August 12, 2010

Chips ahoy!


Ok, maybe that title made you think of chocolate chips, but I'm talking about actual potato chips (although it has no relevance to pirates, it was the first clever thing that came to my mind...). In any case, potato chips are the first recipe I made out of the new book. I narrowed down the choice to chips as I already had potatoes in the fridge, and, as I have already shared, I love using the mandoline!

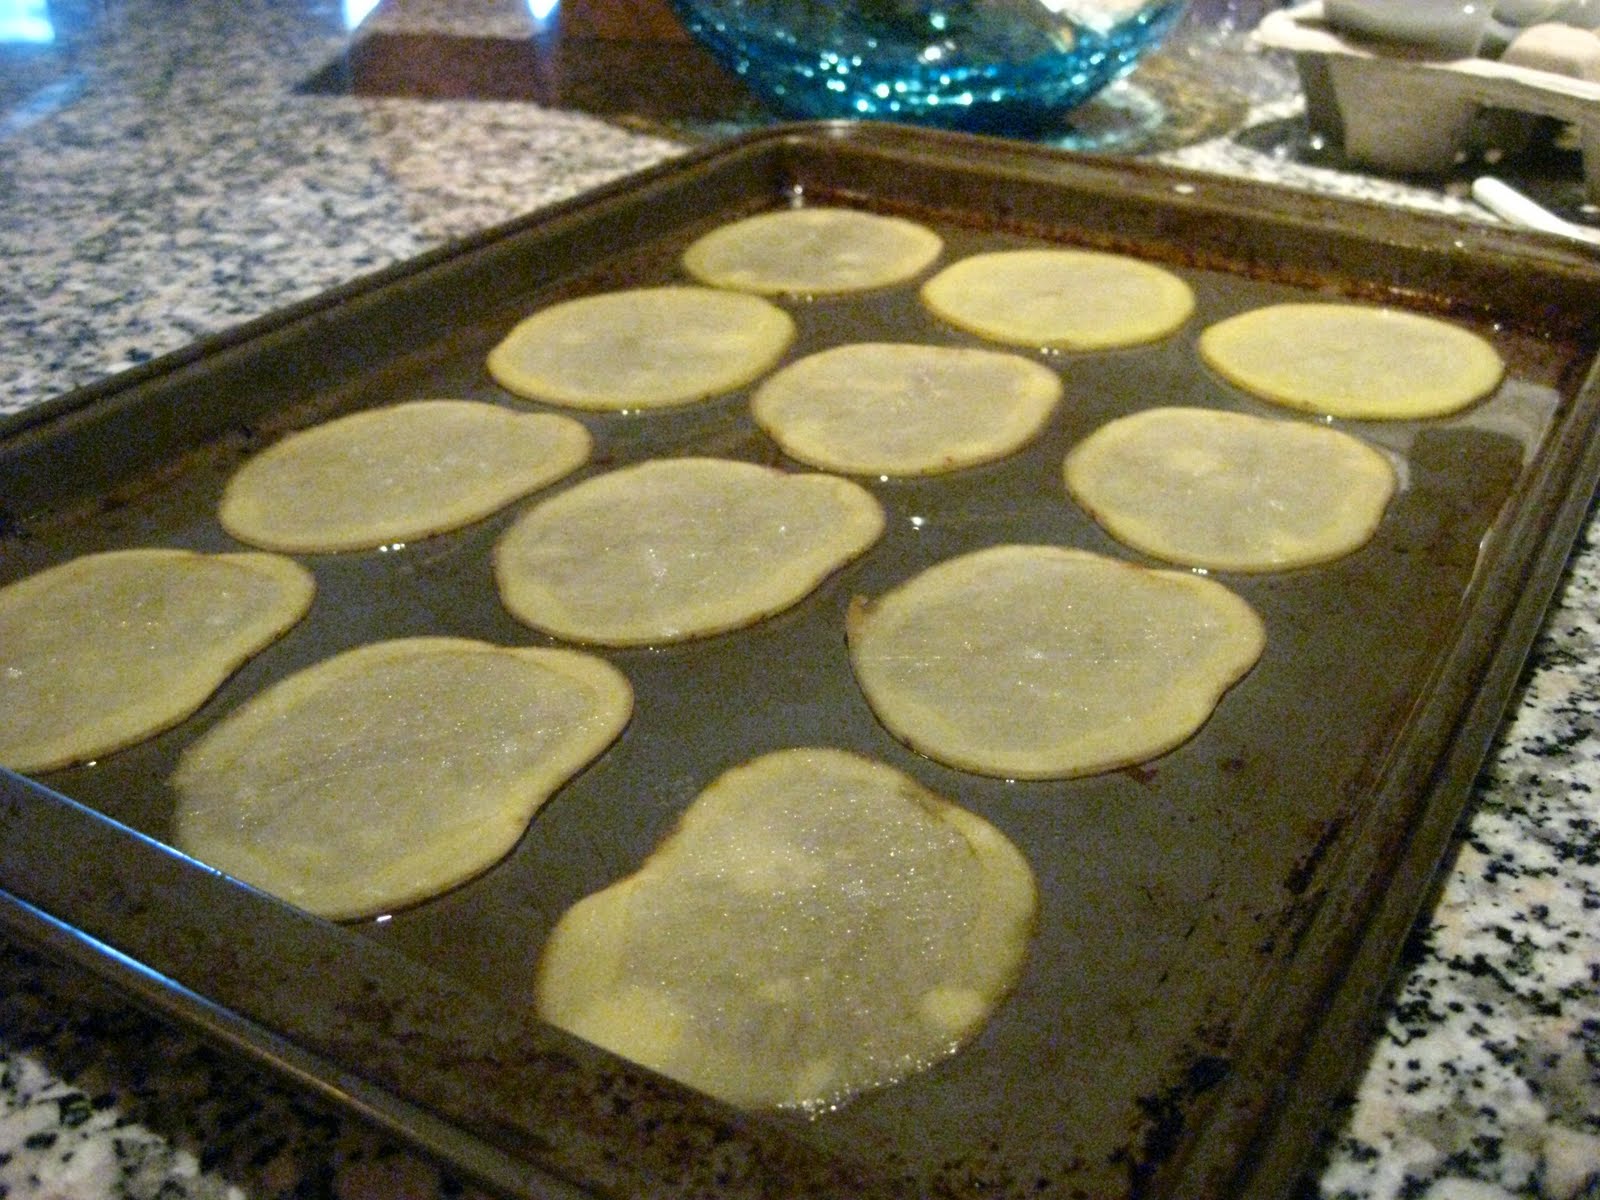
So, away I went. Directions were not that difficult to follow, and the beauty thing with this recipe is that you bake them in the oven and not deep fry them (although the book did have both options...). After slicing them thinly, you lightly oil a few cookie sheets and lay the potatoes, careful not to overlap (I was surprised at how many slices you get from just two potatoes!). The book was not clear on whether or not to wash the slices, so I just put them on after cutting them. Bake them in a 300 degree oven until crisp, then lightly salt and cool on racks.

They turned out really nicely, but very brown, as you can tell. I wasn't sure if that was due to the potato I used or the heat of the oven, but they didn't taste burnt. The side that was in the oil was a little bit greasier than I would have liked, but at least it gave the salt something to stick to. 

I did want repeat the process again (Matt gobbled up that batch in no time!), this time using parchment paper instead of oil. I also rinsed the potatoes after slicing to see if this would make a difference. And for one sheet, I salted the potatoes  before baking. The second batch turned out just as good, but as you would imagine, much drier. And the downside to that was that the salt had nothing to stick to. But salting them pre-baking worked like a charm! Not quite sure which method I prefer yet; the oil is probably easiest, but the parchment makes for some easy clean up! In either case, we have fresh potato chips in 40 minutes, so what's not to like about that?!?!

If you'd like to try at home, here's how you do it:

  1. Preheat oven to 300 degrees. Oil baking sheets with neutral vegetable oil.
  2. Scrub, dry, and slice potatoes about 1/16 inch thick. Peel or don't.
  3. Arrange slices in a single layer, making sure not to have them overlap.
  4. Bake for 40 minutes, or until chips are thoroughly dried throughout, testing the center of each chip for doneness.
  5. Sprinkle with salt to taste.
  6. Transfer to wire rack and let cool.
They will keep for about a month.... if you can get them to last that long!

Wednesday, August 11, 2010

Jam it, Pickle it, Cure it!


I recently received a new cooking/baking book from my wonderful mother for my birthday (thank you, Mom, and a shout out to Matt for finding it!). It's filled with delicious ideas for desserts and snacks and other great treats, and it really was the cover of the book that caught my eye (and probably Matt's, too!). I had already been toying with the idea of making my own jams, but this book just takes it to a whole new level! I was very excited to flip through the pages to see what creative cooking I could do next... (I wish my kitchen has those fully stocked shelves!)

If you can't read the fine print in the top corner, let me enlarge it for you here, because you must all know that two of the three are probably some of my favourite foods. And now this book is telling me I can make them?!?! A-MAZING! I immediately had to flip to those pages to see what was required in regards to equipment, time, resources, and of course, space. Turns out, not that much! The cheeses, as I guessed, are a softer cheese, like ricotta. I don't think I'll actually be able to make my own hard Cheddars, but the bacon is actually a pretty easy recipe. I think the only thing I'm lacking is a smoker, but I think I know friends who might have one to borrow, especially if they get to try the bacon.

The book has a website with a few of the recipes, including the bacon, so feel free to browse HERE. There is also a blog to follow, but it doesn't get updated nearly as often as mine.... =)

So, what to make first. Guess you'll just have to wait and see. Ok, you know I won't keep you in suspense that long... probably just until tomorrow.

Thursday, August 05, 2010

What to do with a fresh basket of peaches...

man, the lighting in my fridge is good!
You may not think there is any other answer to that question than to eat them. There probably isn't really, but in my mind, the question of the day is HOW to eat them. And now that I've found the farmer's market at Metro Hall on Thursdays, I dream all week what I can make with the local fruits and vegetables I'll be picking up. Today's trip was to pick up said peaches, some corn on the cob, and some fresh tomatoes.  The corn is for dinner, as are the tomatoes, which are destined for a roasted tomato and pepper sauce for my home made spaghetti (look for that post later...).

So, what exactly to do with the peaches, I mean, besides eating them as is? There is something extremely satisfying about taking a big juicy bite. My first thought was dessert! And to accomplish that, I whipped out my trust mandolin (my new favourite kitchen gadget for slicing and dicing), and finely sliced a few peaches. I then placed them in small oven safe bowls, and sprinkled a combination of brown sugar, butter, and oatmeal on top - the classic topping for an easy peach cobbler.

I know you can't really see the peaches, but they are under there...

It turned out we weren't really in the mood for dessert that night, so why not a peach cobbler for breakfast the next morning?!?! Just cover with aluminum foil and refrigerate for the night, and warm in the oven the next morning. Put a spoonful of yogurt on top, and what a great morning treat.  

Wednesday, August 04, 2010

Summer Bruschetta

Ok, I can admit it. I've been getting pretty lazy during these summer days. Work has slowed down a bit, and the hot and muggy weather makes me kind of tired, to be honest. And with the amount of traveling and visiting we've been doing, it doesn't seem like much baking or cooking or knitting is getting done (or posted about!!). But, the start of August has given me new energy after a relaxing long weekend, and I'm back at it!

And to assure you all, the bread making still continues, quite regularly in fact, but today I thought I'd share with you a recipe to use on freshly made bread or a nice store-bought baguette - bruschetta!! A couple of my bread loaves have been used to make these delicious appetizers (which we have actually served as a side dish), and having found a new farmer's market just steps outside our door, it's a great way to make use of the summer produce. The recipe itself is made equally easy by using a pre-made bruschetta mix from Epicure (a great line of spices and seasonings to make a huge array of dishes. I love my Epicure!). My base if from the recipe is on the side of the jar, with a few additions.  

Ingredients
  1. 2 cups diced tomatoes
  2. 1 tbsp olive oil
  3. 1/4 cup diced red onion
  4. 1/2 tsp lime juice
  5. zest of 1 lime


Halve the tomatoes and remove seeds, then finely dice into small, bite size pieces. Finely dice the red onion and combine with tomatoes in a medium bowl. 


Add the lime zest, lime juice, and olive oil and toss.


Sprinkle the Epicure Bruschetta spice mix and combine thoroughly. I also recommend making at least a day beforehand to let the flavours really intensify.


Just before you're ready, slice your bread into thin slices, brush with olive oil or butter and broil in the oven to a golden brown. Then spoon on a good helping of bruschetta, top with feta, if you're so inclined, and....crunch! Enjoy.


This is a great little snack that can be done on the bbq, too, if you don't want to heat up your oven.  

Tuesday, August 03, 2010

Bread Diary - Wheat Stalk


For a family dinner a few weekends ago, I offered to bring the bread and the potato salad. With a new batch of dough resting in the fridge, I had been waiting to try this shape of dough for a while. It seemed the most interesting in the book, and the French name, Pain d'Epi, was given because of the shape of the bread - a Wheat Stalk.

I also thought this would be good one to make for the dinner. People could just tear the 'stalks', sort of like dinner rolls to spread with butter. Turns out that is exactly what we did, and it was good! I'm really liking this new batch of dough... it makes me feel healthier knowing there isn't just white flour in it.

Making the stalks was a bit more difficult than I first thought it would be. The baguette shape I first made was too long, so I opted to cut it in half and make two stalks. I don't think I rolled them out thin enough...but practice makes perfect. At least they were still edible...

Tuesday, July 27, 2010

Fat Friday - Brassaii

The return of Summerlicious to Toronto means two things for Matt and I: Good food, good prices! We get the opportunity to try out some of the more upscale restaurants that we probably wouldn't dine at on a regular basis. And, even with the Summerlicious fixed price, it was still somewhat of an expensive meal, but the food - well worth it!

This week I was the one to pick a restaurant, and after reading through the menus of several different restaurants, I settled on Brassaii, a close by restaurant with some good reviews.  Since it's also a limited menu with only three choices for each the starter, entree and dessert, I had to make sure that there was something for both of us. And Brassaii, well, their menu had it all!


To start, Matt and I both enjoyed the fresh bread while we waited for our starter to arrive. We both ordered the Watermelon, feta and arugula salad with balsamic glaze - fresh tossed greens with balls of melon and feta cheese drizzled with vinaigrette... very enjoyable! I was mislead, I thought, when I first read that it was a watermelon salad, because I thought the watermelon would have been more prominent. But it was still darn tasty!


For our entrees, we each took different paths. I ordered the Orecchiette with bocconcini and oven dried tomatoes with pesto, and yes, I had to Google the Orecchiette prior to going to the restaurant to see what it was. Luckily, it turned out to be pasta, and the combination of flavours was really delicious! The sundried tomatoes, I think, were what really completed the dish, and I think I just might have to duplicate this recipe at home in the near future. (On a side note, turns out my KitchenAid has a pasta making attachment that I never knew about - I thought it was just a meat grinder. Thanks to my helpful brother for pointing that out to me!) Matt's dinner was just as good, as her ordered Spice rubbed sirloin steak soy-mustard sauce with Mediterranean cous cous. Once I saw that steak was on the menu, I was pretty certain that he would choose to order that. I tasted a bite, and it was very nice! The cous cous wasn't the usual type we cook at home; it was much bigger and felt a bit more like pasta, but very enjoyable nonetheless! 


Portion sizes were good, which meant we still had room for dessert. I chose the Brassaii chocolate cake layered with lemon gelee, and even though I'm not a huge fan of lemon in desserts, the chocolate cake trumped that and won me over. The lemon was actually a very nice accent to the dark chocolate cake, which wasn't overly sweet to begin with. Matt enjoyed Sable Breton tart with hazelnut cream and a vanilla apricot compote centre, which we actually had to ask the waitress what it was. Turned out, a little cookie with a mousse-like topping. I think he enjoyed it.


Well, I think Summerlicious ended this past weekend, so we won't be able to get out to enjoy another meal. Guess we'll just have to wait for Winterlicious to come back. But there is always Taste of the Danforth coming up...

Monday, July 26, 2010

Bread Diary - Peasant Loaf


So, finally we get to the part in the book where we start using some different types of flour. This Peasant Loaf calls for a mixture of Rye flour, whole wheat flour, and white flour. I found the combination turned out a very nice bread, and was perfect for toasting for breakfast, or with peanut butter and honey for lunch. That seems to be how most of the bread gets used up. But I am saving some slices for a bread salad that I am hoping to make in the near future...

This loaf turned into garlic bread for the homemade lasagna I made for dinner this past week, and it was goooood (both the bread and the lasagna. I think I've finally found the trick to non-runny lasagna, and that's to let the sauce simmer for a couple hours, if you have the time). Of course, in my opinion, anything toasted with butter, garlic, and Parmesan cheese would be delicious. And its kind of funny that we never buy bread any more. It's nice to be able to pull a freshly baked loaf out of the oven, and it only took about 5 minutes to make it! I'm not sure why anyone would ever buy bread again after having found this book...


Friday, July 23, 2010

Wilno-Inspired Perogies


Last year I was introduced to an annual event at the Reid Family Cottage - Live Music and Polish Food at the Wilno Tavern. In a little town called Wilno, not far from the cottage, we drive on over to enjoy the cabbage rolls and perogies, all the while listening to some great live jazz/blues music performed by the local band (throw in some very unique dancers, and folks, you've got yourself a great night out!). This year we again headed out for a great dinner...and the food inspired me to make my very own perogies at home.

A great story that Matt would love for me to share with you is my re-occurring "Big Eyes, Small Belly Syndrome", in which I look at the menu, and seeing that we have the choice between 2 perogies and 3, I, of course opt for the 3, and even then, I think it won't be enough. But these suckers are huge! And while I'm full after the first two, I feel have to finish the third just to prove to Matt that I did not choose the wrong portion (and yes, I have learned my lesson for next year when we go back...). Well, I was full by the end of that little battle... but others had room for dessert, and had I read the menu more closely, I would have chosen only the 2 perogie option and gotten a dessert, too. Alas, another learning experience... The desserts looked scrumptious! Matt chose the apple pie, while our Uncle Doug had the caramel chocolate cheesecake...

I found that making perogies were not unlike making ravioli - the dough is very similar, as is forming and shaping. Matt and I spent some quality time together rolling out the dough and forming into little perogie pockets, and for a first attempt, they were pretty good! We didn't make ours quite as big as the Wilno Taverns, and we cooked enough to freeze extras for another meal. Hopefully the frozen batch will be just as good. I've included the recipe below, with some follow-along photos.

Ingredients

2 cups all-purpose flour
1 teaspoon salt
1 egg, beaten
2/3 cup cold water
1 pound bacon
5 pounds baking potatoes
1 cup shredded Cheddar cheese
salt and pepper to taste
1/4 pound bacon
3 tablespoons sour cream
salt and pepper to taste

Directions

To Make Dough: In a medium bowl combine the flour, salt, egg and water. Mix all together to form dough; cover bowl and set aside.

To Make Potato Filling: Place potatoes in a large pot. Add water to cover, bring to a boil, and boil for 25 to 35 minutes or until tender. Remove potatoes from water and mash. Place bacon in a large, deep skillet. Cook over medium high heat until evenly brown. Drain, crumble about 2/3 of the bacon, reserving the rest for browning the perogies, and stir into mashed potatoes. Stir in cheese and season with salt and pepper.


Roll reserved dough out on a floured surface. Cut circles out of dough, using a small round container. Place a spoonful of potato filling in the center of each circle and fold over, pinching edges together to seal. Bring a large pot of lightly salted water to a boil; drop perogies in boiling water and cook for 4 to 5 minutes, or until they float.


If desired (always recommended), fry with onions and bacon until browned. Serve with sour cream and/or salsa, and enjoy!

Thursday, July 22, 2010

Stuffed Bear for Baby Mia


Good friends of ours recently had their second child (the wife is a blogger, too! She blogged about her experience with her second pregnancy, and how she felt about going from one to two). They delivered a beautiful little girl named Mia Elizabeth Ann (and from one Elizabeth Anne to another, that's a great name...).

We had to drop by to introduce ourselves, and we couldn't come empty handed, after all. I had just put the finishing touches on this little bear, and while note completely girlish, it would make a nice gift. We also made a loaf of lime yogurt bread, something for the parents to enjoy. Sounds like a lot of people do baking as gifts, because they certainly had an assortment of treats to serve us.

The photo doesn't really do the bear justice - it does have some bright and vibrant colours from the variegated yarn I used, but I couldn't quite get a shot I liked. Plus, the lighting in our kitchen is not that great.

Shortly after we left we received an email from the couple with this photo: looks like the eldest might have already gotten his hands on it...

Monday, July 19, 2010

Bread Diary - Crusty White Sandwich Bread


I realize the name of the bread might not be that appetizing... but to finish off the last of my white dough mixture, I made a sandwich loaf for Matt to enjoy his peanut butter sandwiches on at the office, and for myself to enjoy a few pieces toasted for breakfast, too.

This bread is baked up in a loaf pan, and therefore really easy to prepare. It had to rest on the counter for about an hour and half, probably the longest resting time, and then only 35 minutes in the oven. You take it out, let it cool, then slice it up. I don't know if we'll ever go back to buying store bought bread again! The next thing on my to-buy list is a bread slicer, like the mechanical one they have at the grocery stores in order to get nice uniform slices, but for now, I guess we'll to to stick with a knife and cutting board. Although.... I did just come across this link for a bread slicing guide made out of wood (and another on Amazon for something similar). Perhaps my talented father could whip up something similar...  

Since this was the last of the batch, the dough had really increased in flavour, adding a very nice sourdough scent and taste. And, since that used up that last batch, I can now move onto the next chapter in the book...the peasant loafs!


Friday, July 16, 2010

Bread Diary - Finally...a Pizza Peel!

To accompany our chili the other night, I also made just a simple white loaf of bread that we could use to dip in the chili, so, nothing really new for you guys. But the really exciting thing for me, was that just this past Saturday I found myself a pizza peel! A peel is what pizza makers use to move the pizza crust into the hot wood oven stove, and so the same principle applies when baking bread and transfering the resting dough onto the hot pizza stone in the oven.


This may not be as interesting/exciting to you as it is for me, but I had been looking for a peel for a while now and couldn't seem to find it in any of the kitchen stores. But I finally found one at Crate & Barrel, which has also become my new favourite kitchen store (we didn't browse too long). The dough now rests nicely on the floured peel, and when its time to move to the oven, it's just a simple little flick of the wrist onto the hot stone. It slides off very nicely, keeping it's shape and form.


And voila! When it's time to come out of the oven, the peel makes it a whole lot easier to grab the bread from the oven. I had been making do with floured cutting boards and flippers and tongs, but they were often floppy and didn't allow the dough to move as nicely when moving into the stove. So, with my new pizza peel, I am one happy baker!

Thursday, July 15, 2010

Fa-Guy-Ta Chili


The Food Network really has some great cooking shows, and aside from Chef at Home, another favourite of mine is Guy's Big Bite. Sure, Guy himself can be a bit annoying at times, but he really likes to cook with some great flavours and gives new twists to some old favourites. One dish in particular caught my eye, and I've been waiting to cook it for probably about 2 months now. It's a variation on chili, which I know Matt really loves, and Guy serves it up with a side of grilled steak that has been marinated overnight.

So, off to the St. Lawrence Market I went to pick up a steak, and turns out, we got enough for two night's worth! I cut the steak in two but marinated and grilled both halves, and the second half will be used for fajitas for dinner one day next week.

I've had to make a few tweaks to the recipe, using what spices and ingredients I had in the house, but I think it turned out how it was supposed to. I mean, we enjoyed it, so that has to say something... I'll post the recipe as Guy cooks it, but feel free to swap out or switch up ingredients that you enjoy better. (Side note, I didn't take step-by-step photos while making this, but I do think I will continue to do so going forward, as I did with the broccoli soup. That way you all can follow along. It will kind of be like my very own cooking show...)

Ingredients

Marinade:
1/2 cup tequila
1/4 cup canola oil
2 limes, zest from 1, juice from both
1 teaspoon granulated garlic
1 teaspoon hot paprika, smoked if possible
2 teaspoon dark chili powder
1 tablespoon Mexican oregano
1 teaspoon kosher salt
1 teaspoon freshly ground black pepper
1 teaspoon adobo sauce
1 chipotle pepper, roughly chopped
2 pounds skirt steak, trimmed of fat

Chili Base:
2 tablespoons canola oil
2 yellow onions, peeled and chopped
1 serrano pepper, seeded and finely chopped
2 garlic clove, minced
2 tablespoons chili powder
3 tablespoons ancho chili powder
2 tablespoons ground cumin
2 cups low-sodium beef stock
1 (28-ounce can) diced tomatoes with green chiles, juice reserved
1 (28-ounce) can black beans, rinsed and drained
1 yellow bell pepper, seeded and sliced
1 orange bell pepper, seeded and sliced
3/4 cup shredded pepper jack cheese
3/4 cup sour cream
2 avocados
1 lime
warm tortillas to serve

Directions

Marinade:
Add all the ingredients to a resealable plastic gallon bag. Mix well and let the steak marinate in refrigerator for at least 4 hours and up to 24 hours.

Chili base:
1. Add the canola oil into a Dutch oven and heat over high heat. When the oil is hot stir in the onions, and cook until softened, about 5 minutes.

2. Add the serrano pepper and garlic and cook for 2 minutes more.

3. Add the chili powders and cumin, and stir to combine. Cook for 1 minute, then add the beef stock and deglaze the pan, Stir in the tomatoes and beans and combine well. Reduce the heat and simmer, stirring occasionally, for 45 minutes to 1 hour.

4. Preheat a grill pan over medium heat.Remove the meat from the marinade, pat dry, put on the preheated grill pan and cook for 5 minutes per side. Add the chayote and peppers to the pan with the meat and cook until tender, about 5 minutes.

5. Remove the meat from the grill to a cutting board, let rest for 5 minutes and then slice it against the grain.

6. Ladle some of the chili into each bowl and top with some of the meat and vegetables. Garnish with cheese, sour cream, avocado, and lime and serve with a warm tortilla.

Instead of warm tortillas, I served mine with a fresh loaf of white bread. I have to make good use out of that cook book, after all. And we had enough chili leftover for dinner the next night, and it was just as good! I think next time I make this, however, I'd switch the skirt steak out for stewing beef. That makes eating it a little bit easier, and it would probably be just as tasty!

Wednesday, July 14, 2010

Broccoli Cheddar Soup


While you might think I'm crazy to be craving soup during these hot days we've been having, sometimes there is just something very satisfying about enjoying a fresh bowl for lunch. It also adds a bit of a change for me from my normal pita or sub sandwiches I often eat. And frankly, if the soup has cheese any where in it's name, then that's all the more reason to enjoy!

I had the urge for a good bowl of cheddar and broccoli soup, and not the canned kind, so that's exactly what I whipped up for lunch last week. Off to allrecipes.com I went and found a pretty easy recipe. I picked up a couple bushels of fresh broccoli at the store, and the rest I had in my cupboard. It really is a simple recipe, as I believe most soups are, and I've been inspired by friends who frequently make their own (Jess, you're one of them!).  You could probably make a low-fat version of the below by using skim milk and low-fat cheese, but for the first attempt, I followed the recipe pretty closely.

Ingredients:

2 cups fresh broccoli
2 1/2 cups milk
2 1/2 cups cubed processed cheese
1/3 cup all-purpose flour
1 cup heavy cream or half & half
1 box chicken stock
1/2 teaspoon salt
1/2 teaspoon ground black pepper


Directions:


1. Place broccoli in a medium saucepan and cover with chicken stock. Cook until tender. Set aside and do not drain.


2. In a large saucepan, heat milk. Blend in the flour and cheese until smooth. Stir in the cream. Add the broccoli and it's broth to the mixture and season with salt and pepper. Heat soup to warm and serve.


I recommend using a very large saucepan when mixing the milk and cheese; I thought I had a big enough one, but when it came to adding the broccoli and broth, I realized I was going to have to up-size. I also added one extra step of blending the mixture to break up the big chunks of broccoli. I ended up  putting the soup into the blender in two batches after I couldn't locate my handheld immersion mixer (I, of course, found it like 10 minutes later; turned out it was in the only place I didn't look because I was sure it wasn't there!).

I like the texture of the blended soup a lot better. And if you like your soup a little less 'soupy,' add the broccoli first, then add the broth in small ladles to your base until you have your desired thickness. I added it all, but in hindsight, I would have probably added less. But by blending it, it does also add a bit of thickness.

The great thing with this soup is that it freezes very nicely. So, while I enjoyed a small bowl for lunch last week, I let the rest cool to portion into freezer containers - 2 more small bowls, and 1 large one, which we are going to enjoy for dinner this week, probably with a slice of fresh bread...


LinkWithin

Related Posts Plugin for WordPress, Blogger...