Tuesday, July 13, 2010

Fat Friday - The Counter


I'm happy to report that after a brief hiatus, we are back to our regularly scheduled program of Fat Fridays! This week, we take a little stroll to the west of the city to visit a newly opened diner on Bathurst in the lobby of a new hotel/condo building. Like most of our Fat Fridays, it was written up in either Toronto Life and/or the Toronto Star, and this recommendation actually came from Diane (Diane, I hope you'll enjoy vicariously through our experience). 

The restaurant itself is a very retro looking little diner on the main floor of the Thompson Hotel, and freshly opened, too (their website does a great job of photos...)! Although it wasn't very busy when we ate there, I'm sure the good publicity as of late will soon be packing those tables. The menu is what you would also expect from a diner - all day breakfast, burgers, sandwiches, salads, but with a few nice surprises, too. Plus, they cater to room service for the hotel, so if you're very staying there, you can sample the menu without even leaving your room! I really love a simple menu where you're not overwhelmed with choices, so it was easy to choose our dinner.

As was no surprise, Matt went ahead and ordered a burger and fries (his true evaluation of a new restaurant...). It came served on a wooden cutting board, a very nice touch (and if I didn't think they would miss it, I would have tried to fit in my purse...). A side of fries in a little bowl accompanied the meal, and I believe the toppings on the burger included mozzarella, tomato and spinach, to live up to it's name - The Tricolour. Really, how could you go wrong? And I don't think they did, because Matt enjoyed the meal thoroughly.

Myself, I went a little gourmet and tried out there Double Mac and Cheese, which came topped with pancetta, truffle oil and garlic toast. And it was done to perfection! I loved that the noodles with the small corkscrew variety, and I'm sure there was no less than 3 different cheeses blended in. And when it came served in a cast iron bowl, I was sure that I would eat it up and still have room for dessert. However, I do have the "Eyes are bigger than Belly" syndrome, which Matt loves to remind me of, and so we left with a little doggy bag. The leftovers were just as good, as I enjoyed them for lunch today... 


An added touch, as you wait for your meal, you're served a little cup of pretzel sticks to snack on. I love when restaurants do something special like that... you can tell that we are not difficult people to please.


Saturday, July 10, 2010

And you wonder why I don't like them...


Mushrooms! Yuck in my book. It's no secret that I do not enjoy these little guys (it's one of the things Matt and I bonded over, in fact. That and our dislike of Beyonce...). Just look at that picture... the gross little fungus emerging from the earth. And to think, people pick them and eat them! Ok, yes, I know this forest variety of mushrooms are not exactly the ones that people saute in a pan and toss in a salad, but they all come from the same family, in my mind.

And these little guys were what greeted me each and every morning at the cottage this past long weekend. Some of them were already decomposing and began looking really gross and slimy... even more appetizing, no? I imagine they started out something like this....

Maybe it's the texture I don't really like about them, because I've been told they really don't have that much flavour. And before you judge, yes, I have eaten them. Sometimes unknowingly, like hidden in spaghetti sauce, and sometimes out of politeness if they were served to me as a dinner guest (I was the dinner guest, not the mushrooms, just to clarify...that would be just weird if someone invited a mushroom to dinner....). But I'll tell you, it takes a lot of mental will power to actually choke them down. I just pretend they aren't there, but if I see them, it makes it all the more difficult.

In any case, this is most likely the one and only blog post dedicated to mushrooms; you'll probably never see them in any of my recipes online, especially because if the original recipes calls for them, I automatically delete them....

Friday, July 09, 2010

Bread Diary - Ciabatta


To accompany the fresh pasta and sauce we had for dinner Monday night, it was only fitting that we had a bit of Italian bread on the side (like we needed more carbs....). It was also the next loaf in the book, so it worked out perfectly (it was like I planned it or something...).

There are some really interesting facts I'm learning as I progress my way through this bread book. For one, a lot of breads use a very similar dough, usually white flour, and the variation is in how you shape and form them. A ciabatta, for example, is a flattened oval loaf that rises only slightly in the oven, creating some lovely air pockets. It also does not require a dusting of flour on the top, and instead you shape the bread with wet hands (to keep from sticking). This gives the crust a more uniform and golden colour and crunch.

Even though the recipe didn't call for it, I sprinkled a bit of garlic powder on top of the bread before I baked it for our version of garlic bread. In hindsight, I might have just made a garlic butter, because its a little powerful on my toast in the morning...

Thursday, July 08, 2010

Fresh Pasta and Tomato Sauce


It seems that June just flew right by us (as I say with every month, it seems...), and especially since Matt and I were very busy during the weeks (baseball, movie screenings, birthday surprises - I'm not complaining by any means!). But  being so busy meant either grabbing food on the go, cleaning up leftovers, or just putting together quick meals. We hardly grocery shopped in June, and it really feels like I haven't cooked in ages! Well, aside from the bread, that is. And we've recently returned from a nice vacation at the cottage, so my plan for this week is to cook and bake like no body's business!!

So, to start out the week, for dinner Monday night I got really inspired to cook something delicious and somewhat labour intensive (working from home has its advantages, especially when work is slow...). I couldn't think of anything better than fresh pasta in a home made tomato sauce, accompanied by a loaf of ciabatta (0f course!) - a whole Italian night.

I pretty much knew the basics of making a tomato sauce, but just to see what else was out there, I searched online for a recipe.  But after much looking, I couldn't one that really spoke to me. I then remembered the collection of cook books I have on my shelf, and in particular, one I received for Christmas from my brother, Jeff, and his wife, Christine, "How to Cook Everything" the website is very good, too!). I should have known to go there first, because of course, it had exactly what I was looking for, including how to roast the tomatoes and turn into a sauce. So that's exactly what I did!


First, I cut and seeded the tomatoes, then roasted in the oven with a bit of olive oil, salt, pepper, and garlic. Next, I sauteed up some onions in butter and olive oil with a dash of red pepper flakes (for a bit of a kick) until golden brown, then combined both the tomatoes and onions in a blender. I added a bit of tomato paste for a more intense flavour, and also some of the reserve tomato juice I had after draining the seeds. I then let it sit in the fridge while I moved on to rolling out the pasta.


I love making fresh pasta, even if it can be a bit frustrating. And yesterday was no different, but the end result was well worth it. I have made the pasta several times for the ravioli I make, so I feel pretty good about getting the consistency of the dough right, but this was the first time that I used the pasta cutting attachment for the pasta roller to make spaghetti noodles. It was a bit frustrating, since I think I rolled the dough too thin, and the cutter didn't separate it entirely. I probably also made the mistake of making the dough too early, because after I made the sauce, most of the noodles had stuck together. Grr...! At that point, I was about ready to through in the towel and just used packaged noodles, but I thought I'd come that far, may as well go all the way. So, I balled up the dough again and rolled it through again, this time making them not as thin, and also remembering to toss them in corn meal afterwards. This helps the sticking, plus, the dough doesn't absorb any of the extra, as it would with plain white flour. This really made a difference (again, I've learned a lot through your mistakes!).

I should point out that at the time of the second rolling, most of Toronto lost the power (hence why the photo appears a little dark). This wasn't a big issue, other than the fact that my air conditioning no longer worked, but I feared that if it stayed out too long, we wouldn't actually get to enjoy the dinner I have worked so hard to make. It wouldn't have spoiled, mind you, and we could have enjoyed it the next night, but that's not the point. My mouth was already salivating for the pasta and sauce! Luckily, I had done all the prep work before the power went out, and thankfully the power was restored around 7pm, so dinner was saved after all!

Wednesday, July 07, 2010

Bread Diary - Loaves 3 & 4


I have to say that loaves 3 and 4 in the bread book were not all that exciting; I mean, they were pretty exciting for me to bake up, but nothing really special to share with you here today. I baked them more to use up the dough before we left for the cottage, so they were pretty much a variation of the first loaf.

The one pictured above turned into sandwich bread for Matt's lunch for the week Nothing says lunch like a fresh loaf of bread with peanut butter at the office (this is what Matt enjoys EVERY day, in fact... with an apple and a few handfuls of pretzels. We like consistency in our little family...).


The last loaf we took up to the cottage (I never like to come empty handed, so I also brought along some peanut butter cookies...). This one really had a great sour dough flavour, and we toasted it for breakfast one morning to enjoy with scrambled eggs and the BEST smelling maple bacon. This latter is a very odd thing for me, because smelling it made me really crave the sweet and the salty, but I really have this thing about sweet meats; you know, like dipping your bacon in the syrup from your pancakes - these two things never happen on my plate! But just the smell of this maple bacon made my mouth water, plus, I'm a sucker for bacon in any form, and I thoroughly enjoyed it! I don't think it's going to make me start dipping my bacon in syrup, but I just might pick up a package next time I'm in the market for bacon.

So that wraps up the first round of bread baking. The next round uses the same dough but shapes it differently. They do sort of all taste the same, as would be expected, but I'm having a lot of fun experimenting and practicing my bread techniques.

Later recipes call for some different flours, such as rye and whole wheat. In anticipation of those recipes, we took a quick trip to the bulk barn to pick up a few different flours. I could have easily spent hours in there and left a lot poorer, but I settled on just two different ones... I'll keep you posted!


Tuesday, July 06, 2010

A finished pair!


Way back in November of last year, I set out to make a pair of socks. I made one, and it turned out great. I then was so enticed by knitting in the round and finally mastering my double pointed needles that I moved on to knitting mittens and the second sock just never got made (I guess I could always say I lost it in the dryer...). At the time, I had picked up enough yarn to make two different pairs of socks, so when a friend's birthday came due, I thought I'd finally get around to making that second pair of socks. Of course, I tried to make them on a deadline, and well, that never seems to work out well for me. But I did finally finish them this past weekend, so I'll be giving them a little wash and putting them in the mail.  

The great thing about the sock yarns are that they are often self-patterning, which means all you have to do is knit and knit and watch the pattern unfold before your eyes. I find this the most exciting thing about these yarns, and keeps knitting, which is a very repetitive motion, interesting and fresh. These grey and black ones turned out really lovely, and will keep your little feet nice and toasty. However, one turned out a little longer than the other, but this taught me a very important thing about knitting, and its something I NEVER do (partly because I'm a tad lazy).


All patterns tell you take time to check your gauge, and I do not (partly because I'm stubborn, partly because I'm just too darn anxious to get started on the project). But that little skipped step has bit me in the tush this time around. I knitted the first sock while measuring all the way, making sure that the sock came out the right size. I then looked at how many rows to an inch the first sock turned out (which is technically what checking your gauge is), and for the second sock to finish the pair, instead of measuring, I just counted the rows. Well, I guess my math and/or measuring is not that great, because not only did the second sock come out a tad bigger than the first, I also ran out of yarn! (I am certain that I am now cursed with this sad fact for the rest of my knitting career...) Luckily, I had a bit of black in my yarn stash and I was able to finish off the last little bit of the toe in a solid colour...whew! I have certainly learned my lesson.... isn't it great what we learn from trial and error?


Monday, July 05, 2010

Bread Diary - Fresh Baguettes


The next loaf in the book was a fresh baguette. It uses the same dough as the previous bread, just shaped differently, and with the dough sitting in the fridge a few days longer, it also picks up more of a sour dough tanginess. I'm trying really hard to follow closely to the book, making each bread in order, but I have to admit that I get a little bit impatient as the desserts are at the END of the book... but we'll get there eventually.

So, after lifting out the next pound of dough and letting it rest to room temperature, I formed them into two small baguettes. These were destined to be breakfast toast one Saturday morning, but would be equally as nice if used for fresh bruschetta or garlic bread (something to try out at a later date...) . We settled, however, on slicing them to toast. Matt enjoyed his with butter, and I added a bit of honey to mine. Not much more to say about these little guys, except they were delish!

Tuesday, June 29, 2010

Fat Friday - Queen Margherita


Sometimes, you just have to go with the flow. And for me, that means trying out new restaurants that Matt has read about in Toronto Life (I know, harsh life, right!?!). As you all know, we both really enjoy food, but I would have to say that it really has been Matt’s influence that has developed my taste buds. He’s always on the look out for great new restaurants that have either unique ideas, or have a classic take on some of our favourite foods. This last mission was to try out a new pizza place in Leslieville, Queen Margherita (the link is to an article in Toronto Life; their official website is coming soon).

I’ve written about our dining experience(s) at Libretto, a pizza place in Ossington, and while we really love the food there, the actual getting a table can be a bit challenging. We’ve heard the wait can be up to 90 minutes, but since we’ve always planned our dinners for about 4:30 on a Sunday, we’ve been fortunate to get a table. But when Matt read about Queen Margherita, and the rivalry it has with Libretto, well, that’s where we were headed next. And the huge bonus – they take reservations!

Although we dined on a Thursday, it was our version of Fat Friday, and we headed there with my friend Christine. As with Libretto, they have a Fixed Price menu, which lets you choose an antipasto, a pizza, and a dessert. Let's start with Christine’s meal.


To start, the Antipasto: ricotta cheese with dried cranberries, lettuce, and a drizzle of honey, and she finished it all, so it must have been very good! For her Pizza: cherry tomatoes, olives, and capers (she said pretty much the most intense flavour combinations all on one pizza! We let her eat that one all herself...). 


Matt's meal was very refreshing! For his Antipasto: A fruit salad consisting of watermelon, strawberries, and blueberries, and light dressing of olive oil. His pizza order: a plain pizza with mozzarella and fresh basil. (Matt likes to try out the very basic of pizzas, I guess so that he has an even playing ground for comparison.)


And for my meal, it was very meaty... My antipasto was roast beef with pickled carrots and arugula, which I wasn't sure I would really enjoy, but it was darn good! That's the great thing about trying new dishes. My Pizza was a spicy sausage, hot peppers, and goat cheese, and even though I couldn't finish it all, it was great!
And to cap off the night, we all enjoyed our desserts. Matt had the lemon gelato served with a shot of limoncello, a shot of lemon liqueur, while Christine and I treated our taste buds to the tiramisu.


We were stuffed by the time we left the restaurant (Matt more so than me, since he likes to finish off the crusts of my pizza), and since they do take reservations, we will most likely be heading back there some day soon...


Monday, June 28, 2010

Bread Diary – The First Loaf

While the newly mixed dough rested in the fridge over night, I then got to planning our meals for the week to decide when we should enjoy our first loaf. These past few weeks in June have been extremely busy, actually, so we found ourselves eating in less and less, and instead, tended to grab quick meals before we headed out for the night. With baseball games, music concerts, and all the birthday surprises Matt had planned, well, dinners in seemed to be on the very bottom of our list.
letting the dough rise, left, and after taking out of the oven, right

But, if you know me, I can sometimes be very impatient when I have something new to try out, so I decided that dinner one night when we needed a quick meal would be grilled cheese on a fresh loaf of bread. And so, I set out to work, following the directions of measuring off about a pound of dough, shaping it into a small loaf, letting it rise for 20 minutes, then baking it in a hot oven. It was lovely to watch the dough rise bigger and bigger, and then begin to brown, all the while the smell of fresh bread filled the condo. It wasn’t long (only 30 minutes) before the bread was ready to come out and we were ready to enjoy.


After slicing into thick slices, slathering on butter and layering with cheese, I popped them into a skillet, low and slow (I actually pick up a lot of really great cooking tips from watching the TV cooking shows…), until they were golden brown on both sides. Served up with a side salad (so we don’t feel terribly guilty about the fat we were about to ingest), and it made for a really great dinner, and the bread with delicious!

I’m guessing the trick with baking fresh bread is to make a loaf that’s small enough to be enjoyed in one sitting, and this first trial run seemed to be just right. No leftovers! I would call it a success.

Saturday, June 26, 2010

Birthday Surprises!

This year for my 30th birthday, my wonderful husband planned several nights of birthday activities, all of which were surprises to me. I don’t think it mattered that it was my 30th birthday, either, because Matt is fantastic about doing something special for any birthday.

My first birthday surprise was an Ingrid Michaelson concert at the Phoenix. We had seen her the summer before, and she was great, plus had since picked up both her CDs, so actually, seeing her a second time was a bit more fun because I knew more of her music. (A funny side story, Matt and I were talking about Ingrid the weekend before the concert, and I had casually said that I probably wouldn’t see her again in concert, not because she wasn’t good, but because I thought, “I’ve already seen her.” I think that worried Matt about the upcoming concert and whether or not I would like it, but it was a great surprise and concert, and Matt, I’m sorry to have worried you!)

The second surprise was a wine and cheese tasting at Leslieville Cheese Market on Queen St W (sorry, no photos – was too busy eating cheese!). We often frequent the market to pick up some good cheeses and have always seen the adds promoting the class, so again, great planning on Matt’s behalf! (He is really setting the bar high for me when his birthday comes around…) The course was pretty packed, and after serving us all a glass of red wine, the instructor then introduced us to the theme of the night – Ontario Cheeses! We got to sample 5 different cheeses from across the province, and was even introduced to a Barely Blue cheese, which we thought we might not like, but were surprised at the nice flavour.

The last and final surprise was a cooking class for couples at Calphalon, conveniently located right by our condo. As we headed out for the night, I had an idea that this might be something he had planned, and even though I told him that’s what I thought it might be, he of course denied – as any smart person would! But the minute we walked in the door, I knew for sure. And it was a great birthday surprise indeed. It also fit into the birthday theme this year of kitchen and cooking.

The night’s menu was Surf & Turf, and for Matt, it would be his first time tasting lobster. We both are not huge seafood fans, but the one time I had eaten lobster, I liked it because it was meaty and not so fishy, as I find other fish can be. Plus, who wouldn’t enjoy lobster once it’s dunked in melted butter!

The class was packed with 12 couples each at their own cooking stations, and after a small salad for the two of us to share (class took about 3 hours, so it was going to be after 9:00 before we were ready to eat), we were ready to begin class. We started with a espresso chocolate mousse, and the two of us worked together whipping egg whites and melting chocolate chips. We started with dessert so that it would have time to set while we cooked the rest of the meal.


While that chilled, we moved on to our appetizers – spinach, roasted red peppers and goat cheese philo triangles. I had never worked with philo paper before, but I think I need to start to! You brush each paper with melted butter and layer them on top of each other. Then you add the filling (the cooked spinach, shallots, garlic, roasted red pepper and goat cheese), then fold into triangles. Brush again with butter, and cook in a hot oven for about 10 – 12 minutes (we were given the recipes for everything we made that night, so we probably will try this dinner again soon!).

Next step: marinate the lobster and shrimps in a combination of olive oil, finely diced garlic and one hot pepper, and let sit for 10 minutes or so. While that rested, we moved to the steak – Matt took over the cooking here and did a fine job getting the steak just right! We made a quick sauce of red wine and shallots, reduced, and drizzled over the steak. The final step for the marinade was to add lemon juice and salt, then place in a grill pan on the stove to cook through. Once that was all done, plate it up with the steak, and enjoy! Roasted potatoes and melted butter were already prepared for us to enjoy (the butter was a HUGE hit with us…), and what a great dinner! Plus, it was extra special that the two of us got to cook it together.


We finished off the night with our chocolate mousse, one each, plus two to take home to enjoy later. If anyone has ever thought of taking a cooking class, I would highly recommend it. It was a lot of fun, and I picked up some great little cooking tips and of course, a few good recipes.

Turning 30 has actually been a LOT of fun... Thanks, Matt!

Thursday, June 24, 2010

Bread Diary - In the beginning...

I recently celebrated a birthday, a milestone birthday in fact (the big 30), and I have to say, the transition from my 20's to 30's so far has not been that bad. Perhaps it will hit me later, but for now, 30 is turning out to be a pretty good year. And, as with most birthdays, I got to celebrate with good food, my dearest family and friends, and even received a few presents. There was certainly a kitchen theme this year, probably because most of my family reads this blog, and I am always excited about kitchen stuff.

My mother was very kind to take me shopping at a kitchen store as part of my birthday gift, and honestly, it's like I was a kid in a candy store! So many great little kitchen gadgets, so many cooking pans and cooking utensils... what a great way to spend an afternoon with your mom! I ended up picking out a few things I needed for the kitchen, but since I also have to take space into consideration, I didn't leave with any big items. That will come later when I have a big kitchen to fill. Plus, I was looking for a few items to accompany the other gift I received... A bread book!


In keeping with the them,  Erin gave me the above book, Artisan Bread in Five Minutes a Day. She also has a copy at her house, and probably saw me flipping through it, and so, very thoughtfully, thought to get me my own. As the title suggests, the recipes in this book are pretty quick to bake up, but the trick here is that you actually mix together one large batch and keep it in the fridge in a large container with a lid (thanks to Erin, I now have a new bucket, too!). The idea is that when you want a fresh loaf of bread, you cut off a small portion (the dough makes enough for 4 loaves), shape it, let it rise, and then bake it while you're making the rest of your dinner. And each loaf is different as the dough sits longer, developing a sour dough flavour over time. The author's do preface that the 5 minutes a day does not actually include the resting and baking time, but after baking a few loaves already, it really does take just 5 minutes to get the dough ready.


left: after mixing up the batch;                                             right: after 3 hours of rising

So, needless to say, I was very anxious to get mixing the giant batch to keep in the fridge, and then very excited to watch the progress as the dough increased in volume. You might think it was like watching paint dry, but not at all! It didn't take long for the dough to triple in size, then you store it in the fridge for up to two weeks. I have a goal to try out every recipe in the book, and sort of like the Julie/Julie project, I hope to keep you all posted as we progress.


Thursday, June 17, 2010

Fat Friday - The Works


This is the Out of Town version of Fat Friday we enjoyed two weeks ago now (yes, I'm a little slow and out of order on the posting, I'm afraid...). While we were visiting Erin and her family in Ottawa the other weekend, we also got to enjoy a great burger at a place called The Works. And as the name suggests, we were not disappointed for a lack of food assortment to choose from. You really could get your burger with the works, or at least your pick of the works.

If you feel like drooling a bit, take a look at the online Menu with the very unique dish names and combinations (for you more adventurous eaters, there is a peanut butter, cream cheese and jack cheese burger - the Hold The Phone burger....). It took Matt and I quite a few minutes to decide on exactly which burger to enjoy, but for the local McLeans, deciding was easy. We've also been told that the milkshakes are delicious, but we opted for a pitcher of beer instead. If we're in the neighbourhood again, which we probably will be, we will have to try one. It's not just your standard vanilla, chocolate, strawberry, my friend. Oh, no... try only about 27 different varieties to choose from!

And so, what did we all enjoy? Of course I documented it all.

For Emily, our 3 year old niece, a grilled cheese was ordered on her behalf, served with sweet potato fries. Honestly, I think all the adults were more excited to see the dish arrive with a delicious grilled cheese croissant (you know our affinity with croissants...). Emily seemed less impressed and instead continued to colour and nibble on the fries. Good food seems to be wasted on young children... luckily, her hungry father was able to finish hers off even after he was done with his burger.


Erin, my sister-in-law, who is currently on a no dairy diet, opted for a veggie burger served with avocado. It's been a while now, so I don't actually remember the name of the burger, but looking at the menu, it could have been Avril's Avocado Avalanche (Erin, you can correct me if I'm wrong on this one...).


Her husband Brad ordered up a Three Ring Binder, which, as you can see, comes topped with three fried onion rings, along with fried mushrooms (eww...), Gouda cheese, and chipotle mayo. If you're a fan of mushrooms, you'd probably enjoy this mammoth of a burger!


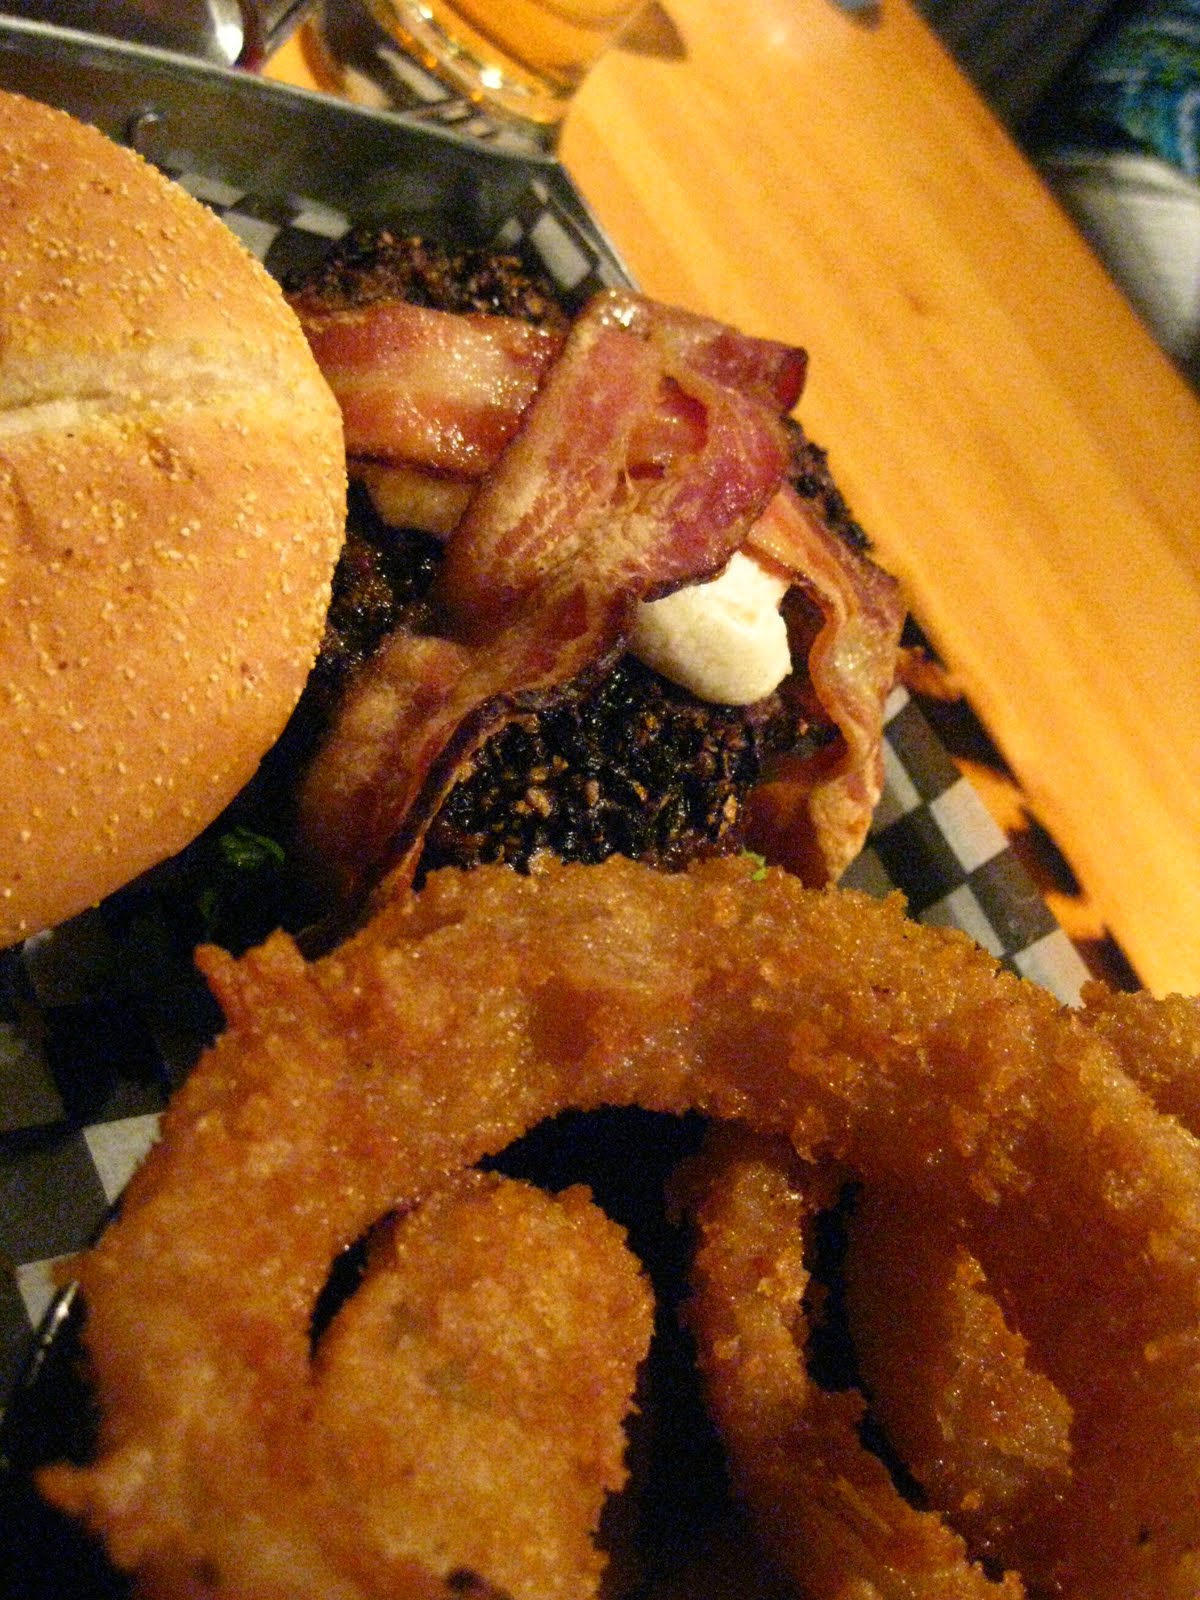
Matt ordered something similar to mine, below, a burger topped with jack cheese and bacon, but his also came with a touch of bbq sauce - The Smokey Mountain. I think it's really great how they come up with these flavour combinations - might be a fun job to be a taste tester in their kitchen.


Myself, I ordered The Love Goat, a peppercorn crusted burger topped with goat cheese and smoked bacon - yum! The creamy goat cheese cut through the peppery burger, and the bacon added just the right amount of salt. A really great burger indeed! And of course we each got an order of rings and fries so that we could share.


It's too bad there isn't a Toronto version of The Works, although, it might be trouble for Matt and I if there were!

So, that was our Fat Friday Out of Town edition. We were glad to enjoy a great meal with our family - Fat Friday is always better shared with others!

Friday, June 11, 2010

Frogging is Fun!!

I think it's really great when I can learn something from my friends who read this blog (thanks, Jess, for sharing the tip on Frogging!). I have also since learned the origin of the term - since you're essentially ripping out the yarn, row by row, the "rip it, rip it" reflects the sound a frog makes! How clever, us knitters are, eh?

In any case, I happily frogged the striped grey sweater (once you start, there really is no going back...), which took a WHOLE lot less time than actually knitting it up... and then I found just the prefect little sweater to knit up, and basically, I've been working on that non-stop for the past two weeks, taking a break only to finish up the knitted dress for Ava.


And now, I'm happy to say, it's finished. And I love it! It's now a sweater that I can wear out and that I think looks decent (I say decent, because I think I made it a bit too short, but I'll just put a tank on underneath or something). This was knit completely in the round with ZERO seams to sew up (something that often takes a lot of time), and casting off and then on again, you create the two arm holes. There is even a nice little detail at the top of a few small pleats, which I think really adds a nice touch. And since there isn't a front or a back, you never have to worry about putting it on backwards!

Since the striped pattern is uneven (the light gray has a wider stripe), I was left with extra of the dark gray yarn, so now I might have to make an accompanying piece. Not quite sure what yet, and I have been tempted to pick up an additional blue/teal colour in the same texture, so that might be my next project. All my major projects seem to be wrapping up, so it's time to move on to something else! Ah, the possibilities...


Thursday, June 10, 2010

Summer Cous Cous Chicken Salad


A good friend of mine, Darlene, introduced me to this salad last year while we were camping together, and it's only taken me a year to ask for the recipe! She told me its best to make this salad ahead of time and let sit in the fridge at least over night to let all the flavours combine, but she also warned that the cucumbers can go soggy, so add those at the end before serving.

With a few substitutions and additions, I made this salad Monday night for one of our lighter-fare dinners. I kept mainly to the recipe for the amounts (this one serves 4 easily, so needless to say, we have some left overs for tonight...). The major addition was a chicken breast, cooked and diced, to add a bit of protein, and instead of feta, I used goat cheese, which I had on hand. I would say you really could throw anything into this dish and it would still turn out fantastic! I especially liked the dressing, which added a nice subtle drizzle of flavour, and since the cous cous absorbs most of it, it's not a runny salad by any means.

Now that I look at the recipe again, I think I only used the pine nuts and cucumber! I added orange peppers, and none of the other ingredients, in fact (this was probably due to me shopping without the list of ingredients on hand...). The original recipe is below, but feel free to experiment,as I did. 


Ingredients

2 cups water
1/3 cups cous cous


1 teaspoon salt
1/2 teaspoon ground black pepper
2 tablespoons red wine vinegar
1 1/2 tablespoons Dijon mustard

1/2 cup olive oil

1 cucumber, seeded and chopped
1 (4 ounce) container crumbled feta cheese
6 green onions, chopped
1/2 cup chopped fresh parsley
1/4 cup toasted pine nuts


Directions

Bring the water to a boil in a saucepan over high heat. Remove from the heat, and stir in the couscous. Cover, and let stand for 10 minutes. Scrape the couscous into a mixing bowl, fluff with a fork, and refrigerate until cold, about 1 hour.

Once the couscous is cold, make the dressing by whisking together the salt, black pepper, red wine vinegar, and Dijon mustard in a small bowl. Slowly drizzle in the olive oil while continuing to whisk until the oil has thickened the dressing. Fold the cucumber, feta cheese, green onions, parsley, and pine nuts into the couscous. Pour the dressing overtop, and stir until evenly moistened. Chill 30 minutes before serving.


I'll be posting our Fat Friday - Out Of Town Edition shortly, so you'll understand why we opted for a lighter dinner on Monday. Plus, we also enjoyed some wings with my father on Wednesday, so that's partly another reason why...

Wednesday, June 09, 2010

A Rainbow Summer Dress for Ava


If you remember back a few weeks ago now(It's the little things in life...), I had just picked up a great new ball of colourful yarn that I was very excited to start knitting. I began work immediately...and then ran out of yarn (I really should plan better, eh?). So, back to the yarn store I went to pick up another yarn to finish off the project, but in the meantime, I had gotten involved in other knitting projects, as is often the case. So, even though I now had the yarn to finish the project, it sort of just sat there as I continued working on other things.

But there was a looming time line to get this finished (this past weekend), so I had to turn my attention to it and just finish off those last few darn rows. It really didn't take any time at all, and now that lovely little ball of yarn, I am happy to report, has turned into a sweet little jumper for our niece Ava, who turns 1 in July. 

This was a pattern I had previously knit for another friend, but decided this time to knit it in the round to avoid having to sew up any side seams (it's a great little sun dress for girls, and I like to keep it in my repertoire. If you change up the yarns, it's a whole new dress each and every time!). The only thing I didn't count on, however, is that you have to then knit the front and back portions separately, and using the variegated yarn, well, that presented me with a slight issue of being able to match the colours. But in the end, I figured it wouldn't really matter all that much. If you look at the pictures below, you'll notice the slight difference at the top of dress between the front and the back, but I think this also makes it unique and one of a kind.


I really like the versatility of this dress - in the summer you can wear it with a short sleeved top, and in the winter, pair it with tights and a long sleeved shirt. I think the only downside is that you have to hand wash this dress, (sorry Erin!) which in future versions, I might aim to avoid.

I know have almost a full ball of this yarn left over, so I'll be thinking about what I can knit with that. I really loved the rainbow effect, and part of the reason this dress knit up so quickly is simply because I couldn't put it down! I was so excited to see how the colours evolved that I had to keep going. That's the part of knitting that I really love...

Tuesday, June 08, 2010

The REAL Peanut Butter Cookies

If you remember the previous post, I was looking for a peanut butter cookie recipe that also contained more than just eggs, sugar, and peanut butter. It doesn't take long to find a recipe when you know what you're looking for online. The challenges is when you're not sure WHAT you're looking for, like when you have to cook dinner. (On a side note, I don't think I've cooked dinner since a week ago Sunday, and that's really strange for me. That's probably why I was looking for something to bake...).

So, of course, where do I turn but good ol' allrecipes.com. I did first look in several of my cooking books, but then resorted to the web when I couldn't find the right one. And now I've even gotten in the habit of writing down the recipe on a recipe card right away - sometimes you can't find the exact one you've baked when you search the site again. Of course, posting the recipe here is always a good fall back, too.

I also learned a great little technique for spooning out the cookies (since the recipe made 4 dozen!). By using a measured tablespoon, I just scooped and dolloped the perfect amount on to the cookie sheet, then smooched with a fork (all very technical cooking terms...).


This really helped save on time and gave me some pretty uniformly sized cookies. I was expecting them to stay about the same size (as the previous batch did), but with the addition of flour and baking soda, they almost doubled in size and were nice and chewy. This batch was given to the McLean's over the past weekend, but we did keep a few around the house for a little snack at lunch time.

Funny side story: while I was mixing up this batch, I was also doing a few other things in the kitchen and probably wasn't paying as much attention as I should have been. After I added the flour, the dough still seemed pretty crumbly, but the recipe did call for it to sit in the fridge for an hour. I was about to put it in the fridge as is, when I remembered that I had forgotten to add the eggs to the butter and sugar mixture! I thought for sure the recipe was ruined but decided to add them anyway. Luckily, the eggs still blended in nicely, and the dough turned out much less crumbly. Whew!

Ingredients
1 cup unsalted butter
1 cup crunchy peanut butter
1 cup white sugar
1 cup packed brown sugar
2 eggs
2 1/2 cups all-purpose flour
1 teaspoon baking powder
1/2 teaspoon salt
1 1/2 teaspoons baking soda
Directions
  1. Cream together butter, peanut butter and sugars. Beat in eggs.
  2. In a separate bowl, sift together flour, baking powder, baking soda, and salt. Stir into batter. Put batter in refrigerator for 1 hour.
  3. Roll into 1 inch balls and put on baking sheets. Flatten each ball with a fork, making a criss-cross pattern. Bake in a preheated 375 degrees F oven for about 10 minutes or until cookies begin to brown. Do not over-bake.
I think I might know a couple father's who might also enjoy a batch, so I might be baking up another batch shortly...  

Thursday, June 03, 2010

MMM.....peanut butter!


I had the urge to do some baking about a week or so ago (I have the same urge today, too!), so I was on the hunt a week for something to bake up. I had been meaning to bake some peanut butter cookies for a while now, so I thought, why not? Plus, I thought that I remembered that the peanut butter jar had an easy recipe on the back.

Indeed they did, and was it ever easy! But I was a little concerned (surprised) when I noticed that the recipe only included three ingredients, none of which was flour - just peanut butter, sugar, and 1 egg (I'll include  the full recipe below). I thought I remembered other recipes being a bit more complex, so I then turned to allrecipes.com and sure enough, many of those recipes included a lot more ingredients. But I thought, "Kraft, you know what, I believe you know what you're talking about, so let's give it a go."

So, away I went, and they turned out just fine - very peanut buttery, which is always a hit in our house. But the funny thing was, I served them to my Marg and Diane one day, and Marg immediately asked if they were the real kind or the fake kind (that women has a nose for baking...I get that from her). I had to admit that they were the fake kind, but they politely ate them anyway. But I am thinking I need to bake up a batch of the real kind shortly. Perhaps that will be my To Do for today.

If you want to try out the easy recipe on the back of the peanut butter jar, just follow the below:

Ingredients
1 cup peanut butter
1/2 cup sugar
1 egg
Directions
  1. Preheat oven to 325 degrees F;
  2. Blend together all ingredients;
  3. Roll into 24 balls and place on an ungreased baking sheet and flatten with fork;
  4. Bake for 15 minutes or until lightly browned (do not over bake).
Easy, right? If I get around to baking the REAL recipe today, I'll post that a bit later.

LinkWithin

Related Posts Plugin for WordPress, Blogger...