Tuesday, November 30, 2010

Gelato Fix


I completely forgot to share wit you the very good gelato we found in Toronto a while back. This was the day we went to Stockyards for our late afternoon dinner (and Matt discovered a new love - the green chile cheesburger) and were looking for a sweet bite for dessert. We walked the kilometre or so to get to the shop (so we could feel better about all the fat and cholesterol we just ingested at dinner), and were surprised to find it quite an authentic gelateria. Soccer was on the TV with a number of Italians watching and cheering along, and menus and flavours were written in Italian.

While the selection of gelato to choose from was limited, there were still some great flavours to enjoy at Novecentro. I opted for the strawberry, while Matt enjoyed the chocolate stracciatella, a combo of vanilla ice cream with chocolate chunks. They came served in a chilled glass bowl with a little cookie straw – nice presentation. We enjoyed the dessert just as much as the atmosphere, but when it came time to pay the bill, we realized we broke our cardinal rule as a tourist. We learned quickly in Italy that it’s much cheaper to get your gelato and coffee to go, as there is a fixed price and they can’t charge you a service fee. We didn’t think this applied back home in Canada! But sure enough, enjoying our gelato sitting down cost us at least an extra $2-3 each. 

We’ve been on a bit of a gelato hiatus since that trip back in October; perhaps it’s the looming winter cold. I’m sure once the warm weather appears again (or Matt gets a hankering for some cold gelato), we’ll be back on the hunt to find more great gelato shops in the area.

Thursday, November 25, 2010

Recipe: Carrot Oatmeal Muffins


For a quick and easy weekday breakfast at our house, I like to try and bake up a batch of muffins, usually on the weekend. I freeze them to keep them fresh, and then we just lift out 2 for the next morning. I’ve done this for Matt in the past with corn bread muffins, but now that we’re both working, we go through the batch twice as fast! To change it up a bit, I saw a great recipe for a healthy and hearty muffin that even had vegetables in it.


It was Chef at Home who first baked up these carrot and oatmeal muffins, and, since he hasn’t let me down yet, I was excited to give them a try. I have always been a fan of carrot cake, but more so for the delicious and wonderful cream cheese icing, but I was willing to give these muffins a shot, too. I’ve baked these up twice now, making about 10 large muffins each time (perfect for the week at work). They freeze nicely, are moist and hearty, and are a very nice breakfast on the go. For a variation, try adding raisins or nuts, and also feel free to leave out the oil and instead replace it with more yogurt. I found we didn't even notice the difference.

INGREDIENTS

2 cups flour
1 cup oatmeal
1 tablespoon baking powder
1/2 teaspoon baking soda
1/2 teaspoon salt
1 cup brown sugar
1 teaspoon cinnamon
1/2 teaspoon nutmeg
2 eggs
1/2 cup oil
1 1/2 cups yogurt
1 teaspoon vanilla extract
1 cup grated carrots (about 3)


DIRECTIONS

PREHEAT oven to 350 degrees.

SIFT together flour, oatmeal, baking powder, baking soda, salt, brown sugar, cinnamon and nutmeg.

MIX eggs, oil, yogurt and vanilla in a large mixing bowl. Stir in carrots and then dry ingredients.

SPOON into large or regular sized muffin cups. Bake for 30-45 minutes (depending on size of muffins).

Wednesday, November 24, 2010

Recipe: The Ultimate Meatball

Matt came across a recipe for The Ultimate Meatball in one of his men's magazine a while back, so we thought we'd give it a try. The occasion? My parents were coming for dinner, and I was making spaghetti and meatballs, and everything was from scratch.

I did a bit of prep work ahead of time (so I wouldn't spend the entire time in the kitchen when parents arrived) and decided to make my pasta a couple days early and let it air dry. I had never done this before, so I was actually a little nervous about how the pasta would hold up when I cooked it. And this was also a new recipe for pasta, substituting semolina flour for the usual all-purpose flour. But I was finally able to get my pasta attachment for my KitchenAid to work this time (prior attempts my dough had been too moist), so my spaghetti actually looked like spaghetti...at least before cooking. My fear came true when the moment of truth came to cook the pasta, and my lovely long spaghetti strands crumbled and turned into bite size noodles. Not the end of the world, since the taste was still very good. But I think next time I'll skip the drying step and go right from fresh to boiling water.

The meatballs, on the other hand, were probably the star of the show. The magazine was not wrong - they really are the ultimate meatball! Well, with cheese and proscuito in them, it's hard NOT to like them. They were easy to mix up and shape, and the batch made a substantial number, so we had plenty of extras to freeze for another night (I'm all about the leftovers now that I'm working - a post for another day). Paired with fresh tomato sauce (just roasted tomatoes and onions and pureed with a touch of salt and pepper to taste), and I'd say a very nice meal indeed.


INGREDIENTS

2 lb ground beef chuck
1/4 cup finely chopped prosciutto
1 tablespoon kosher salt
1 to 1 1/2 tsp hot red-pepper flakes
1 tablespoon ground fennel seed
1 tablespoon fresh oregano leaves
1/2 cup chopped parsley
1/2 cup fresh or boxed bread crumbs
1/2 cup ricotta cheese
2 extra-large eggs, lightly beaten
A splash of olive oil


DIRECTIONS

PREHEAT oven to 450 degrees. In a bowl, gently mix all the ingredients with your hands until thoroughly combined. Roll the mixture into tight golf-ball-size spheres, about 2 tablespoons each. Lightly oil a shallow baking pan or an ovenproof skillet, add the meatballs, and roast without turning until just cooked through, about 15 minutes.

This recipe is a keeper for sure!

Tuesday, November 23, 2010

Recipe: Buttermilk Biscuits


To use up some of the left over buttermilk I had from making the oven-baked onion rings, I found this recipe for drop biscuits -the perfect compliment to our Sunday night bowl of chili. They were fairly easy to make, and using the buttermilk added a very different flavour to just the usual flour and milk biscuits. 

INGREDIENTS

2 cups unbleached all-purpose flour (10 ounces)
2 teaspoons baking powder
1/2 teaspoon baking soda
1 teaspoon sugar
3/4 teaspoon table salt
1 cup buttermilk (cold)
8 tablespoons unsalted butter , melted and cooled slightly (about 5 minutes), plus 2 tablespoons melted butter for brushing biscuits

DIRECTIONS

PREHEAT oven to 475 degrees. Whisk flour, baking powder, baking soda, sugar, and salt in large bowl. Combine buttermilk and 8 tablespoons melted butter in medium bowl, stirring until butter forms small clumps.

ADD buttermilk mixture to dry ingredients and stir with rubber spatula until just incorporated and batter pulls away from sides of bowl. Using greased 1/4-cup dry measure, scoop level amount of batter and drop onto parchment-lined rimmed baking sheet (biscuits should measure about 2 1/4 inches in diameter and 1 1/4 inches high). Repeat with remaining batter, spacing biscuits about 1 1/2 inches apart. Bake until tops are golden brown and crisp, 12 to 14 minutes.

BRUSH biscuit tops with remaining 2 tablespoons melted butter. Transfer to wire rack and let cool 5 minutes before serving.


The batter made about 14-16 biscuits when I mistakenly doubled the buttermilk, and hence, had to double everything else, but they froze very well for another time. I also found a creative use for them when I decided to chop up 2-3 of them to make croutons for our salad the next night. I browned them with a little olive oil and salt in a skillet until they were crispy and crunchy and sprinkled on top. Yum!

Friday, November 19, 2010

A variation on a favourite


One of our quick and easy go-to meals for dinner some nights is just a simple pizza. We pick up the crust pre-made at the grocery store, along with a can of pizza sauce, and various other toppings. Mostly it's been spicy salami with goat cheese, but we decided to mix things up one night and try a BBQ Chicken style pizza.

For this pizza, I had made (and frozen) a batch of bbq sauce for some pulled pork, a recipe from my brother, and since it made a fairly large batch, I was looking for something else/new to try it on. I drizzled the bbq sauce over a chicken breast and baked in the oven four about 35 minutes. Once that was cooked and partially cooled, I shredded it into pieces, and sprinkled it over my pizza sauce (a mixture of pizza and bbq sauce), then added broccoli and feta cheese. I like to think this is our 'healthier' version of pizza, but I bet the added broccoli doesn't offset the layer of feta I sprinkled on top. But regardless, it's nice to have an alternative version of pizza to add to our list of week night dinners.

Come to think of it, it has been a while since we've had this one, so I think I need to put it into next week's meal plan...

Thursday, November 18, 2010

Beer...the continuation

A while back, I posted about our beer making attempts at home in the condo (Taking after Percy). At that point, the beer was resting in the fridge, waiting to be consumed, but, months later, I keep forgetting to post an update after we drank them. But I was reminded the other day when I was sorting through some photos and found this one. 


I have a small correction to a statement I made in that post. I mentioned that my grandfather used to make his own beer in the basement (this is true) and that my nana had made him a needlepoint to remember his attempts (this is incorrect). Turns out, it was my very own talented mother who made the piece of art (talent inherited from her mother, and then passed down to me), and after reading that blog post, she surprised me by giving the needlepoint! It now has a place in our bookshelf, a nice memory of my grandfather.

So, the beer? Yup, it tasted like beer, and it wasn’t bad for a first attempt (and nothing exploded!). We found that the very first bottle we cracked open was very carbonated and almost had a sweetness to it. It seemed like the longer we let the beer rest, the better the flavour got (but the carbonation still seemed to linger). I still don’t know if my brother ever drank his two beers, but we finished off ours over the summer. Guess we’ll have to get a refill pack to start the process again… but I think we’ll leave that for next summer.

Wednesday, November 17, 2010

Fat Friday - The Stockyards Part II

It was bound to happen one of these days. Even though we have numerous restaurants to choose from downtown, for a recent Fat Friday, we found ourselves at a familiar spot – The Stockyards. On our first visit, we had hoped to enjoy their ribs, but, upon finding them sold out, settled for the fried chicken and pulled pork instead. We were not disappointed, however, and probably were even more anxious to try the ribs next time.

And so, after some time, a second visit, was in order, this time planning to arrive early to make sure we got a taste of what they’re known for – the ribs. I won’t dwell on those (as delicious as they were…); you’ve read all about that already (or can by clicking the link). But The Stockyards menu seems to keep getting better and better, and we keep getting different recommendations from people on what to try next, so it was time for another trip back.


We combined this trip with an outing to the Wychwood Barns, a restored TTC yard where artists have live/work studios, a farmers market throughout the year, and various other activities. It was a perfect fall day to explore the city, so we took advantage of our TTC passes to do some sightseeing. Unfortunately, the farmer’s market had wrapped up by the time we got there, but it was still very cool to see the renovations to turn a repair shop into a great outdoor/indoor venue for the community.

Ok, but on to the food! For this trip, we had heard about a very good Green Chile Cheeseburger that is often on the special board and an equally enticing Porchetta Sandwich. Turns out, the Burger is regularly on their special board, just not part of their menu, so we weren't disappointed when we arrived. We ordered one of both and eagerly waited for our name to be called. We arrived early that day to grab one of the limited spots in the restaurant, so at least we had a spot to dine. And how did they measure up?


Well, since Matt was at one point a resident of New Mexico, known for green chile, he ordered the burger, leaving the Porchetta for me (not that I minded…). His current favourite burger can be found at the Owl Bar in New Mexico, but that is certainly a long way to go when you’re hungry. Unlike the Owl Bar burger, which serves its beef patty with a slice of cheese and chopped green chile on top, The Stockyards served theirs with chopped green chile mixed into a creamy cheese sauce and then spread on the burger. I almost wish I had a picture of Matt eating it, because I think the Owl Bar has found its match. In fact, Matt was so pleased with the burger, that he complimented the owner/chef himself! I had a bite or two, and it was darn tasty, although perhaps a little too hot for me to handle. Matt had no problem with that, though. Guess growing up on the stuff helps a little.


The Porchetta sandwich that I enjoyed was very different from the burger. Not a lot of heat on this one, but lots of flavour. I defer to the menu to describe this sandwich: fennel and garlic scented pork loin, pork belly, and cracklings served on a baguette with garlic aioli. How can I describe the taste of this really, because it wasn't like pulled pork, and it wasn't like bacon, nor was it like ham...so try and think of something in between all of those things and that might be close to this sandwich. In any case, it was mighty good.

Upon leaving, we took a look at their menu again and realized we'd have to come back again to try something new, plus maybe have their ribs again. If others are like us and keep coming back for more, The Stockyards, I bet, will be around for a while.

Tuesday, November 16, 2010

Change is good!

There have been some changes in our little household over the last view months, and unfortunately, these changes seem to have adversely affected my blogging time. You may have noticed that posts have been somewhat sporadic and sparse (I probably think more about it than you…), but I’m back in the saddle, baby, and ready to blog again.

But a little more about these changes, for those who might not know. At the end of August, my company decided to do some restructuring, and in the process, felt I was no longer a necessary part of that team. Bummer, right? The adjustment to being unemployed, however, really wasn’t all the difficult, as my work-at-home job was currently in the slow season. So instead of getting up each morning and following the same routine (gym, shower, eat, answer emails), I now just did the same without having the pesky work part involved. Needless to say it was a complete shock to be let go, but honestly,  I didn't mind the extra free time I was about to have. 


Being unemployed meant I now had a LOT more free time on my hands, and the couch and crappy/mindless TV became my new caffeine addiction. I got a lot of knitting time in, plus a lot of napping, but there always seemed like a good reason not to look for a job. Sure, I was updating my resume and casually searching online for new opportunities, but I don't think I was quite in a hurry to get back into the workplace. Also, we had our honeymoon approaching in just a few months, so really, I thought I’d start looking much more seriously after that. But the sitting on the couch being lazy Beth also didn’t give me much motivation to blog…

I’m happy to say, just 3 months later, I am again gainfully employed with a great company in a new and exciting industry. This one is a full day of office work, the 9-6 type of gig, which, I’m not going to lie, is taking some getting used to, but I think . Before I had the luxury of finishing up work early (and starting late, not to mention almost the entire summer off) and could easily find time to prepare some delicious yet time consuming meals for dinner. This is probably my biggest challenge of the change – less time at home. But some planning ahead has proven to be a useful tool and our dinners thusfar have not suffered. I mean, sure, sometimes we don't eat until 7:30....

And it’s not that I have a lack of things to blog from my time off; I’ve been knitting, baking, and cooking up a storm! Now it’s just trying to find the time to tell you all about it, because I’m sure you all want to know about my buttermilk biscuits, apple-smoked pork chops, not to mention carrot oatmeal muffins! And that’s just a start….

Monday, November 01, 2010

Recipe: Oven-Baked Onion Rings


Do you want that deep fried, crunchy taste of onion rings without having to actually deep fry them? I have just the recipe for you, thanks to America's Test Kitchen. I picked up a copy of their Best-Ever Recipes and when I found this one, I knew I had to try it out. With their helpful tips, I was able to whip up some really good and crunchy onion rings in the oven with using only a little bit of vegetable oil. And the process is really not that difficult; slicing, dipping, breading, and baking is pretty much it. 


The trick to getting the crunch is in the secret coating you put on the onion rings: a fine blend of saltine crackers and kettle chips! The texture of both combined really creates a crunchy coating on the onion rings, and the flavour is great! For mine, I experimented a bit and bought Aged White Cheddar chips instead of the standard salted ones, and I think it added a really nice extra taste to them. Next time I might even opt for Sea Salt and Vinegar to give that extra little sourness to them. But with the flavoured chips out there, the possibilities are really left to your own imagination. 


INGREDIENTS

1/2 cup flour
1 large egg
1/2 cup buttermilk, room temperature
1/4 tsp cayenne pepper
1/2 tsp salt
1/4 tsp black pepper
30 saltines
1 bag kettle-cooked potato chips
2 large onions, cut in 1/2 inch thick rings
6 tbsp vegetable oil

DIRECTIONS

PREHEAT oven to 450 degrees. Place 1/4 cup of flour in a shallow baking dish. Beat the egg and buttermilk together in a medium bowl. Whisk the remaining 1/4 cup flour, cayenne pepper, salt, and black pepper into the buttermilk mixture. Pulse the saltines and potato chips together in a food processor or blender until finely ground, then transfer to a separate shallow baking dish. 


WORKING one at a time, dredge each onion ring in the flour, shaking of excess. Dip in the buttermilk mixture, allowing excess to drip back into the bowl, then drop into the crumb coating, turning to coat evenly. Transfer to a large plate and repeat with remaining onion rings. 

POUR 3 tablespoons of oil onto each baking sheet (2 or 3 sheets, depending on number rings). Place in oven and heat until just smoking, about 8 minutes. Carefully tilt the heated sheets to coat evenly with oil, then arrange the rings in a single layer. Bake for 15 minutes, flipping the onion rings over halfway through. Transfer ring to paper towel-lined plates to drain briefly and serve immediately. 

NOTE: the onion rings can be breaded in advance and refrigerated up to 1 hour before baking. Let rest at room temperature for 30 minutes before baking.

I bet trying these with BBQ chips would be very tasty.... 

Wednesday, October 27, 2010

Bring on the Beef!

I know you have all waiting for a blog post about all the Italian pizza and pasta we ate on our two weeks (at least that's what I'm telling myself...), and believe me, there was a lot! So, readers, wait no more. Read on and let your taste buds water. 

I could easily write numerous posts about the food we ate in Italy, but instead, I thought I would highlight some of the best meals we ate while away. But thinking more, I might have to narrow it to a few different meals in each city. Not every meal was a winner, I have to admit, and with so many restaurants to choose from, you sort of gambled each time. But with menus posted outside each restaurant, that certainly made deciding a bit easier. And our guidebooks warned us to stay away from the tourist traps, the restaurants that posted their menus in several different languages, or had a set Tourist Meal. I think we did pretty good on that front. 


But there were a couple recommendations that we received from friends before leaving, and one place in particular sticks out in Florence. The place to head was Il Latini, known for its beef, and both Matt and I were very excited to visit. We made reservations well in advance, and with only two seatings, one at 7:30, the other at 9;30, we wanted to make sure we got a table. Turned out, however, that reservations meant very little, but a little elbowing sure goes a long way. And we made sure to have a small lunch that day to show up extra hungry. 


And its a good thing we did! After being seated at a table of 6 with two other couples, the waiters arrive with food. A bread basket with oil and vinegar await us at the table, along with a large bottle of red wine, but we're careful not to fill up on that. First to arrive is a plate of prosciutto, then a plate of bruschetta with chicken liver, and, do you believe it, we ate it! Ok, we tried it. It wasn't that bad... Next, a caprese salad of fresh mozzarella and tomatoes, and lastly, a plate of sun dried tomatoes. Talk about an antipasto course! And each dish was so flavourful and wonderful, that we just couldn't stop eating. 


I should note that there is no menu at this restaurant. After the antipasto, the waiter returns and asks what kind of primi pasta you want. We had a choice between ravioli and penne bolognese, so we took one of each.


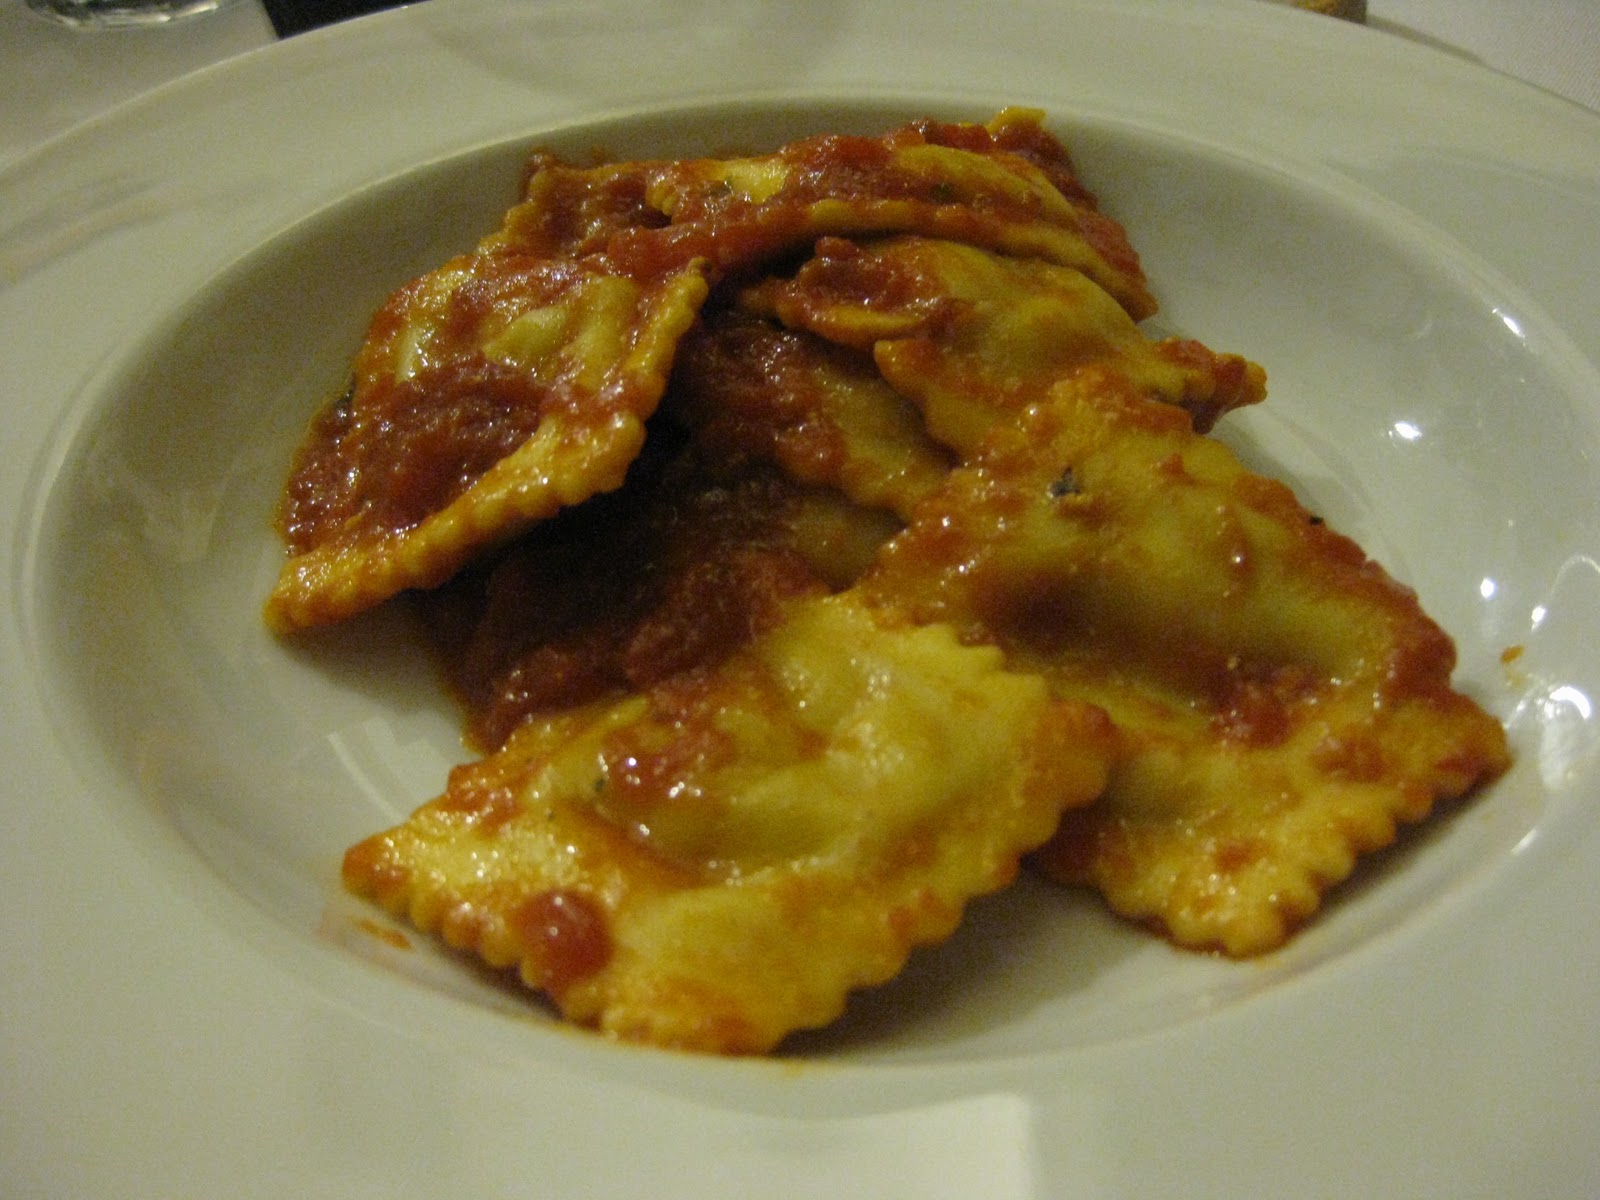
The portion sizes weren't overly large, but they sure were delicious! Some of the best ravioli bolognese I've eaten. You could really taste the fresh ingredients in the sauces and the stuffing, plus the pasta was amazing. The waiter returned, took these plates away, and shortly after returned with this gorgeous piece of steak. And when I say piece, I mean one kilogram of grilled steak, crusty on the outside, pink and juicy on the inside. 


I don't know how we managed to pack away all that meat, plus the side of roasted potatoes, but we sure did do a number. I think the waiter knew what he was doing when courses were spread out with some digesting time, time to enjoy another glass of wine and some great dinner conversation while taking in the surrounding. I'm sure we sat there for at least 2 hours, drinking glass after glass of wine and eating the food that was put in front of us. When we thought there was no more, the waiter brought out a plate of biscotti, a dessert liquor to dip them in, and a couple glasses of Moscato, a lovely and sweet dessert wine (we're now on the hunt for it back home at our local LCBO). 


You can bet that we left that restaurant happily full, pretty drunk, and very satisfied. We talked about that meal for several days after, remembering both the food and the experience. If we knew what was in store for us that night, we probably would have passed on the pasta option, but then again, we would have missed out on a wonderful part of that meal. 


Oh, and the best part? When the bill arrived, we were expecting quite a hefty price tag, but it turned out, it was a flat fee for all that food and wine. Score! 


Tuesday, October 19, 2010

Viva Italia Yarn!

Matt and  I just got back from a wonderful two week honeymoon in Italy. It was by far the best vacation I've been on, and Italy had lots to offer. I'd be lying if I said we didn't partially pick Italy because of it's very attractive and delicious food, but the sights we saw were equally as wonderful. 


I'll be sharing more of said food and gelato and coffee in coming posts, but I'd be remiss if I didn't post something on the Italian wool I picked up in Florence. Prior to leaving for Italy, I finished reading the sequel to Friday Night Knitting Club, in which some of the club take a trip to Italy. I didn't know this when I started the book, so it was a nice surprise and made me look forward to our trip even more. Of course, when they mentioned knitting and the yarn in Italy, I thought I should do a bit of research to see if there were any good shops in the cities we would be visiting. 


Turns out there was. I had read about a little shop by the Duomo, and after a quick bite to eat one afternoon, we stopped in to see what their selection was like, and to see what an Italian wool store compared with ours back home. It was a nice little store, and the selection was pretty good. Most of the yarns didn't have labels on them, so I didn't necessarily know what I might be purchasing, but there was a lot to choose from. And the prices... really unbelievable! We got to the store about 12.30, just a few minutes before their afternoon closing, so luckily we didn't have to come back (I think Canada should adopt the afternoon seista closing hours!). 


My eye was immediately drawn to this lovely grey yarn; the different shades intertwined together I thought made such a great find, and the sign said only 1.50 Euros/50 grams. Not sure how much one ball would weigh, I took it up to the sales clerk to ask. Turns out, each one is only 50 grams, so I picked up three in the hopes of knitting myself my very own Italian...something or other. I limited myself to only three balls, but in hindsight, at that price, I should have picked up way more (you know my history of running out of yarn, afterall...). 


Along with the yarn, I noticed a big Italian fashion trend for bulky sweaters, scarves, and hats, for both men and women, and found this to be quite interesting and great for inspiration. I snapped a few photos to bring home for later use. You can see that grey is the IT colour for fall.  


Upon returning home, I had ideas of a cabled scarf similar to those I'd seen in the window displays, but my first attempt told me this wasn't the yarn for that (on revisiting that attempt, I think the needles were too small). My next thought was to knit a plain vest pullover, but after knitting several rows of that, I quickly realized I wouldn't have enough yarn to complete the project. So, idea number three is currently on the go: a moss-stitch scarf. I know, not the most exciting, but when I wrap it around my neck on a cold winter's day, I'll remember our time in Italy. 


Friday, October 08, 2010

Fat Friday - Canteen


We're back to diner style meals for this week's Fat Friday (actually, did we ever leave?), and for that we headed to the newly opened Oliver & Bonacini's Canteen, located on the main floor of the newly built TIFF Bell Lightbox

We've been watching this new condo building grow taller and taller over the last several months, and with the TIFF arriving in town, they were on a deadline to have the theater space and restaurants open for the grand opening. The Canteen had opened about 2 weeks ahead of schedule, and from the first day, it's been a busy hot spot, crowded with locals and tourists. We stopped by one morning to see what the menu was like, and were delighted to find out that not only do they have an eat in section, but they do take out, too. Our eyes darted to the pastry list on the Grab & Go board and immediately noticed croissants. And if you remember our hunt for the best croissants, we had to give them a try. But we were full that day, so we tried them a couple weeks later. They ranked right up there with some of our favourite croissants, and with being only steps away from the condo, well, that could be a deadly combination. 

But for dinner last night, it wasn't about croissants. It was about tasting their every day dine-in servings. Stepping inside the canteen, you really do get a bit of a cafeteria feel, with  closely-spaced tables and an open kitchen along the back. Servers wear plaid blue shirts, very casual, and the menu is not overwhelming, a few selections of salads, pizzas, sandwiches, pastas, and mains. To be honest, there wasn't a whole lot that caught our eye. We opted to skip the pizzas that night, and I never consider a salad (hello, FAT Friday....), so it was something from their pasta or mains. 


The steak frites seemed to entice Matt, and the Thursday Special (grill) was also a steak - Hammered Steak with Potato Pancakes. He opted for the steak frites with a cesaer salad to start, but agreed we'd have to come back another Thursday for their grill special. The salad was good, but do you see that the fries come sprinkled with Parmesan cheese?!?! Matt didn't even add vinegar to them; a rarity for him, indeed. The steak came with a green pesto of some variety, and his thoughts: "quite good." 

Myself, I ordered something from the pasta menu. The gnocchi really was tempting, but it came served with lamb, and I've never actually had lamb before. The Canteen probably would have been a really great place to try it, but instead, I went for the Mac & Cheese with Quebec aged cheddar and smoked ham, sprinkled with basil (my best guess) bread crumbs. Matt wondered how it compared with the one from The Counter, and, at the time, I said I liked it a bit better because of the added smoked ham, but now that I look back at my previous post, I think The Counter might be a notch or two better, and I think that has to do with the triple cheese factor and the spiral noodles. Regardless, you can't really screw up mac & cheese (unless you add mushrooms), so it was still a winner. 

Saturdays are their burger specials, so we will be heading back to see how they compare to our every-expanding list of best burgers.... and of course, the croissants. 


Wednesday, October 06, 2010

Recipe: Arugula Pesto

To use up some of the food still in my fridge, I realized I had all the ingredients to make a delicious pesto (not having tasted it, I'm only hoping that it will be delicious). Pesto is relatively new to me, but the few times I've had it, be it on chicken or pasta, I really liked the flavour. Of course it has cheese in it, so that could be part of the reason. And I know that pasta can be made with many different green leafy vegetables, and since I had almost a full tub of arugula from our pasta dish the other night, I thought why not? 

So I pulled out my trusty Better Homes and Gardens Cook Book (actually, it's Matt's, but I have claimed it as my own). The pesto recipe in there called for the traditional basil, but I just swapped that out for the arugula. 


INGREDIENTS

1 1/2 cups arugula
1/2 grated Parmesan cheese
1/4 cup pine nuts, walnuts, or almonds
1 large clove garlic, quartered
1/4 tsp salt
1/4 olive oil


DIRECTIONS

COMBINE arugual, cheese, nuts, garlic and salt in a blender or food processor. Cover and process or blend with on-off pulses until a paste forms, making sure to scrape the sides throughout. 

SLOWLY add the olive oil while the machine is running and blend to the consistency of soft butter. 

And that's really all there is to it. 


Since I knew we wouldn't be using this pesto for at least a few weeks, I had read that pesto is a great little sauce to freeze and use later. So to do that, I emptied and dried one of my ice cube trays and filled the cups with pesto, then covered it with plastic wrap and stuck in the freezer. So the next time we want to add a bit of green to our pasta, we just pop out a cube or two and warm in a pot, then pour over the pasta.


Monday, October 04, 2010

Recipe: Cranraisin and Lemon Scones


Mildred Pierce, a well-known restaurant in Toronto based loosely on a classic American film noir from 1945, has a lovely brunch cookbook, which, surprisingly, my husband owned before I met him (granted, it was a gift from his mother). She naturally browsed the recipes in the book prior, and after, and told me about a great recipe for scones. I had been meaning to bake them for a while now, and the perfect occasion arrived. I was looking for a little thank you gift for Diane, and what better way to show our appreciation than to bake up a recipe I know she already likes! 

So, off to the market I went, gathering the ingredients I didn't already have in the house. The original recipe called for dried currants, but finding none in the store, I settled on cranraisins instead. I also needed to pick up some shortening and cream (this is by no means a low-fat recipe!). I wasn't sure how intensive this recipe would be, seeing as it involved rolling out the dough and cutting it, but it turned out to be very easy and pretty quick! And I even found a new use for my ravioli cutter - biscuits! 

After rolling and cutting the scones into small biscuits and layering them on a sheet, I was surprised that they didn't rise more once out of the oven, but they turned out so uniformly that I didn't really mind. Sure, there is something to be said for more rustic-looking scones, but for presentation, I think these ones looked quite lovely. They were a gift, after all. Plus, the little rippled edge from the ravioli cutter turned out to be a very nice touch. And the cranraisin peaking through the dough added a nice touch of colour.

I, of course had to sample one (or two) before giving them away (no great chef sends out a dish without a taste test), and they really were a light and fluffly snack, not too sweet, and the hint of lemon/orange really came through. This recipe yielded me about 24 scones, so I gave the majority of them to Diane, a few to my mom and dad, and kept a few at home for us (they packed quite easily in our carry-on for a quick snack on the go). 

INGREDIENTS

3 cups all purpose flour
2 tsp baking powder
1/2 tsp baking soda
1/3 cup sugar
1/4 tsp salt
1/2 cup unsalted butter, cold
1/2 cup shortening, cold
1/3 cup dried black currants (or other dried fruit of choice)
1 tbsp grated lemon zest (I also added a bit of orange zest)
1 cup 35% cream (I substituted half and half, 10%)

DIRECTIONS

PREHEAT oven to 400 degrees.

USING a coarse grater, grate the butter into the dry ingredients. Add the shortening, and with your fingertips, break it up into small pieces. Combine the mixture until it resembles cornmeal. Stir in the currants and lemon zest. Add the cream, gently working the mixture until the flour is incorporated and the dough forms a ball. 

TURN the dough out onto a lightly floured surface and roll out to a 1" thickness. Dip a 2" round cookie cutter into some flour and stamp out the scones. Press any scraps together and repeat. 

PLACE the scones 2" apart on a parchment paper-lines baking sheet. Lightly brush the tops with some cream and sprinkle with a little sugar. 

BAKE for 15 to 18 minutes until the scones are lightly golden on the outside, fluffy on the inside. Best served hot from the oven. 


Friday, October 01, 2010

Fat Friday - Mercatto


It's been a while since I've posted a Fat Friday, and be honest, it's been a while since we've enjoyed one! But we went to Mercatto about 2 weeks back and thought it was due time to post the review. Although I neglected to take any photos while I was there, hopefully you can envision the meals as you read on (ok, forgot wasn't really the right word. It was more of "it was a really small and crowded place, and I felt slightly odd taking photos of our food. But on that note, a great place for people watching! We thought the couple next to us were on a first date and imagined that their parents set them up, as they seemed to have nothing really in common.) 

Though the restaurant was small, it was quaint, and you definitely had to be OK with letting people in to your personal space, as tables were set closely together, something I find many Italian eateries have in common. But that seemed to make it really cozy and intimate, and we enjoyed our candle lit dinner for two, a great way to relax after a long week at work. 

Matt had read some great reviews about Mercatto, and in particular, their antipasti choices, so he was excited to taste test, as was I. Their Antipasti Misti lets you choose 2 verdu (vegetables), 2 salumi (meats), and 2 formaggi (cheeses) from a selection of six options. We also got a chance to practice some Italian! So the platter we put together consisted of raddichio and barbabietole (beets) for our verdu; prosciutto and bresaola (cured beef) for our salumi; and Piave (12 month aged hard cow's milk) and burrata (fresh buffalo milk) for our formaggi. The platter that arrived looked similar to the one on the left (an image I found on Google), with a couple changes to the verdu choices. 


Eating that platter with the fresh bread and olive oil supplied at the table really made for a great starter. We loved the meats, as we knew we would (we are carnivores, after all), and the cheeses were a really nice compliment to the saltiness of the salumi. The verdu part, however, we didn't love. The beets were nice, but the radicchio salad was a little too bitter for our tastes. Next time we should ask if we can just skip the verdu and have an extra salumi and formaggi.... ha! 

On to the main course (which I already knew I wasn't going to be able to finish). We both were in the mood for pasta, and Matt had no problems deciding on his dish - Bucatini. Fresh pasta served with tomato sauce, pancetta, smoked Italian bacon, and pecorino cheese. Matt really likes the spiciness of the dish, and this is usually a favourite of his. As for me, I went back and forth between a couple dishes but finally decided on the Taglietelle with almond pesto, sun dried tomatoes, and arugula. I went outside my normal comfort zone to try the almond pesto, and it was good! 

With more pasta choices on the menu that peaked our interest, I'm sure we'll head back there again. Plus, there was a whole Pizza menu we didn't even look at! 


LinkWithin

Related Posts Plugin for WordPress, Blogger...